
Elixir feature flags: a step-by-step guide with an Elixir example


Hi! This short tutorial explains how to use Elixir Feature Flags.
Flagsmith allows dev teams to easily change Feature Flags - be it running live services or development environment configuration - from a convenient web dashboard, or via an API, without the need to redeploy their applications.
I'll cover a simple example use case of toggling e-mail notifications on or off in an application.
Without further ado, let's dive right in!
Elixir Feature Flags Step #1 - Preparation
Get your API key
First you’ll need to register on https://www.flagsmith.com/.
Once you have your account and project, go to Development environment > Settings
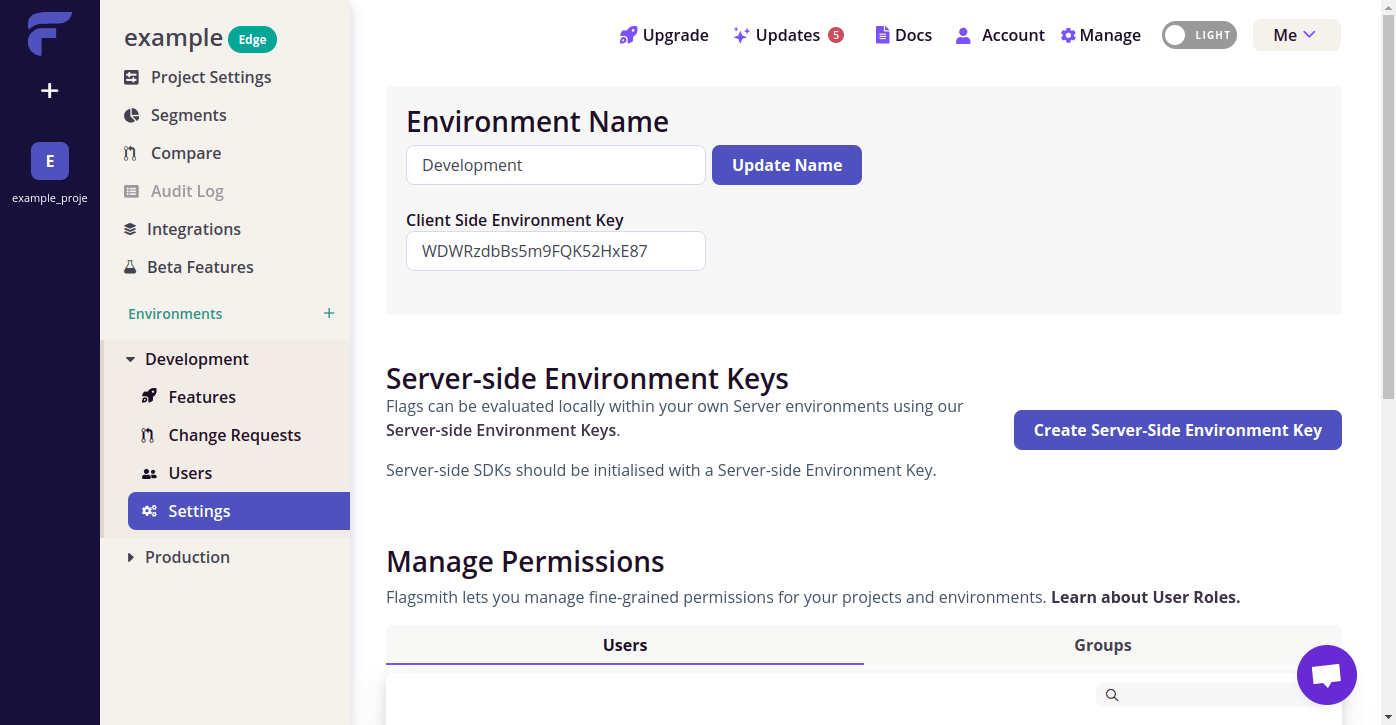
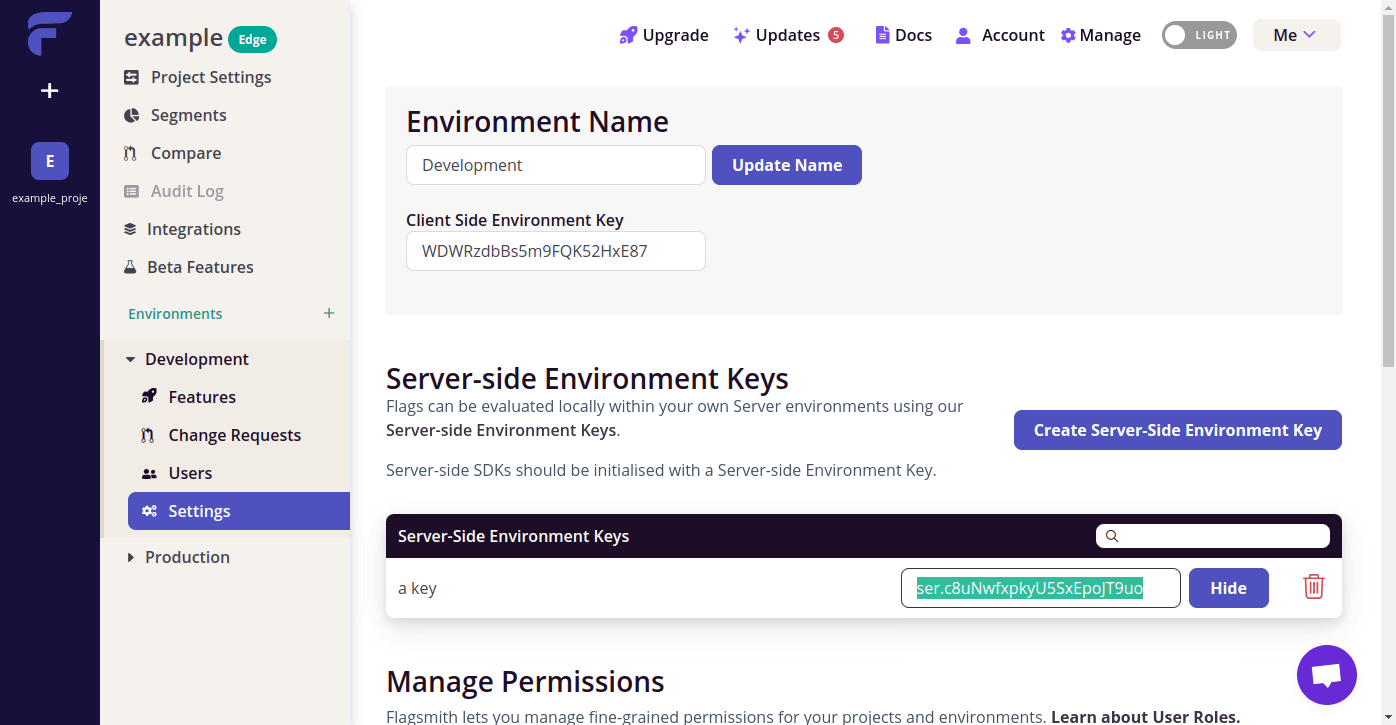
click “Create Server Side Environment Key”
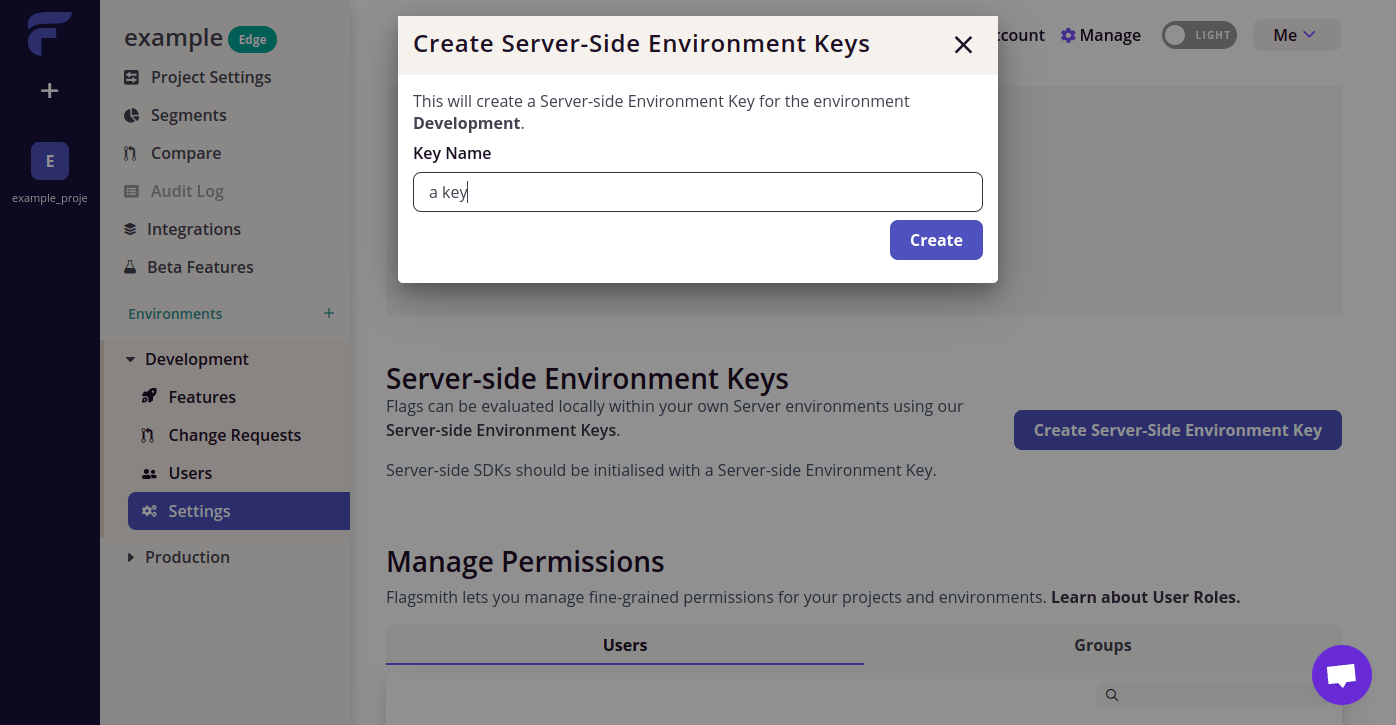
and save your key
Create mix project
Let's get to the Elixir code!
Start with creating new mix project (with a basic tree):
...and open it in your favourite editor.
Installation
It's as simple as adding flagsmith_engine package to your deps in mix.exs:
And then running
in terminal to actually download the dependency.
You can find the package on hexpm.
Connect to your account
Configuration
The simplest way to connect to your Flagsmith account is to create a standard config file and put your Development Environment SDK key into it.
Let's start with standard config/config.exs file:
There is only one line of config which sets our Flagsmith key to example value. This is just to make the config readable for later use - we'll eventually be setting our API keys per-environment, and don't want to have a real key entered in the default config.exs.
The last line imports the current environment config. For development it would be config/dev.exs, production config/prod.exs.
Let's now create our config/dev.exs file:
Here we just import our "secret" config file which usually doesn't get committed into the git repository - we don't want our real keys leaked!
Now create the config/dev.secret.exs file with real key:
And replace the key with one you saved in preparation.
Verify configuration
Now to test your configuration, run:
This should compile your project and run iex console in development mode.
Once you've landed in the console, try running:
If the configuration went well, it should output something like:
Well done - now close iex by hitting Ctrl+C twice and let's code!
Set up mailer
Let's start our notification system by setting up a mailer.
I'll use the Bamboo library made by Thoughtbot to send e-mails.
To install the library add the following to deps in mix.exs:
And run:
in terminal.
If you run into the following failure:
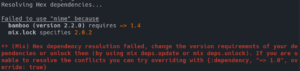
Add the following entry to deps in mix.exs:
And try mix deps.get again.
Now let's create a dummy email module for our notification in lib/notifier/email.ex:
A mailer module in lib/notifier/mailer.ex:
It contains a simple function to send the notification which we'll use later in our scheduler.
Now let's add development config for Bamboo in config/dev.exs:
Now we can start sending emails. Let's create a scheduler to do that for us!
Notification scheduler
To schedule notifications I'll use awesome Quantum library.
To install it add:
to deps in mix.exs and run mix deps.get.
Then create scheduler module in lib/notifier/scheduler.ex:
To start it, we'll need to add it to the supervision tree in lib/notifier/application.ex.
To do that change
to
in start function.
Now to send the notification every minute (that often just for testing in development purpose :)) add the following config in config/dev.exs:
To check if everything's working well try running our application:
After up to a minute the logs should show something among lines of:
-- that means our job has executed and Bamboo sent an email.
Nicely done! Let's get to use Flagsmith to control the notification.
Control the notification from Flagsmith
Add feature in Flagsmith web panel
Let's first head to the Flagsmith web panel. Go to Development > Features
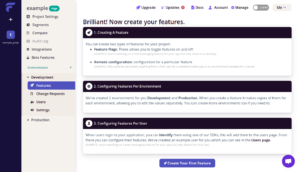
and click "Create your first feature".
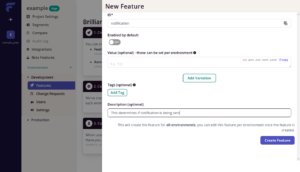
Fill in the form and click "Create Feature".
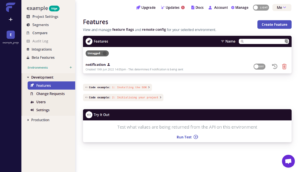
Great! This is your first Flagsmith feature.
Now on Features listing in Development env you can easily control On/Off state of the feature. Let's turn it on for now.
Use feature in mailer
As we already have the feature added in panel we can use it in our code to control the notification.
Open up lib/notifier/mailer.ex and add the following function at the bottom of module:
And then at the top of module:
So we can add some debug logging.
Now let's use our newly made private function in send_notification. Change
to
Voila!
Our if statement will check if the send feature is enabled and either send it just as before, or log out [debug] message saying that the feature is disabled.
Let's run iex -S mix and see it in action - after a minute it should output just the same logs as before.
Now without turning off iex head back to the Flagsmith panel and disable the feature.
After a minute you should see a different log:
Perfect - that means our configuration and code work!
Production environment and deployment
Let's add some production configuration to our app and deploy it.
Configuration
First, let's create a production environment config in config/prod.exs:
We need to configure the notification scheduler and import secret configuration. In secret we'll take care of the Flagsmith and Mailer config.
Let's head to Flagsmith panel, go to Production > Settings, create a Server-Side Environment Key and put the key into secret/prod.secret.exs:
(Again this is just an example key.)
Sending emails
We'll need some kind of external service integration for sending our notification emails.
Let's use MailGun as our Mailer, Bamboo, ships with adapter for it. If you want to use other adapter, feel free to choose one from Bamboo's adapter list and skip the next section.
Set up MainGun
Register for MailGun, go to user panel and save the "Sending domain" address. Then head to API keys and save the Private API key.
Use your domain and private key in secret/prod.secret.exs like that:
Testing
To test the prod configuration, run the mix project in production mode:
Remember to set the Flagsmith feature in the Production environment to enabled and change to: value in lib/notifier/email.ex to your real email address!
After a minute your logs should say something about the email being sent and an email with Very important content should arrive to your mailbox (be sure to also check spam).
Well done! Now as the test went successful let's change our Scheduler to run once a day at midnight to not spam our mailbox. In config/prod.exs change Scheduler config to:
Deployment configuration
Let's now take care about our deployment configuration.
Normally we don't want to store our secrets in the git repository. Instead we'll make our program read their values from environment variables.
To do that, create config/runtime.exs file:
We read from three environment variables - FLAGSMITH_KEY, MAILGUN_DOMAIN, MAILGUN_KEY - which we'll soon create in our production environment.
Deploying to Gigalixir
Let's use Gigalixir for our deployment.
Register for the service. Then go to user panel and create a new app.
Click on the app name, then Configuration tab and add all 3 environment variables.
Next install the Gigalixir CLI according to official guide and run gigalixir login to log into your account.
If you didn't create a git repository before, run git init ..
Then run gigalixir git:remote <your-app-name> in your repository's directory. This will add Gigalixir's remote to it so that we can push the code to Gigalixir for deployment.
To see your Gigalixir apps names (and other details) run gigalixir apps.
Now let's create elixir_buildpack.config file to specify our runtime versions:
If you didn't add any code to the repo, simply run git add . and git commit -m "My commit" to commit the code to repo. Otherwise simply commit the buildpack file before pushing the code to Gigalixir remote.
Now to actually perform the deployment, run git push gigalixir. After couple of minutes you should be able to see your running application in gigalixir ps.


.png)
.png)

.png)

.png)


.png)


.png)


React Native Remote Config: A Step-by-Step Implementation Guide


.webp)