
Using Flutter Feature Flags to Release Features Without Risk


Feature flags help control the potential impact of new releases if anything goes south. Releasing and rolling back mobile applications can be challenging,as users need to go through the specific app store process, but feature flags can mitigate this challenge.
Flutter feature flags enable you to turn a feature on or off without the release process hassle. In this article, we will go through a basic example of how to implement feature flag management for your own Flutter app. Let’s get rolling!
Prerequisites
What you need to know before diving into the code:
1. Any prior knowledge of Flutter and Dart, the programming language you use in the Flutter app, will be very helpful as you follow along with this tutorial. Also, make sure you have Flutter running on your machine
2. Understanding how to add packages to your Flutter application through Pub.dev and the `flutter pub` command
3. A Flagsmith account, as this will be used to create the feature flag. Register now – it’s free!
Next up, let’s look at a simple login screen as our example.
What are Flutter feature flags?
Flutter feature flags are conditional gates— a bool that evaluates to true or false—wrapped around sections of your Dart code to control whether a feature is active for users.
In Flutter applications, shipping even a minor fix means going through the App Store or Play Store review process and waiting days for approval. A feature flag lets you deploy code to production with a new feature disabled by default, then enable it remotely the moment you're confident it's ready.
Example: Adding Apple sign-in to the login screen
In this example, we’re going to make the content of our login screen dynamically controlled by feature flags. Specifically, we’ll put “Sign in with Apple” behind a feature flag so that it will dynamically render depending on the flag. This is just an example, but it demonstrates a key concept that can use in your application in many ways.
Setup
Let’s set up your demo Flutter app and your Flagsmith account.
Step 1: Preparing the Flutter app
We will use the flutter command line tool to create our app. Using your terminal, navigate into your desired directory and execute the following:
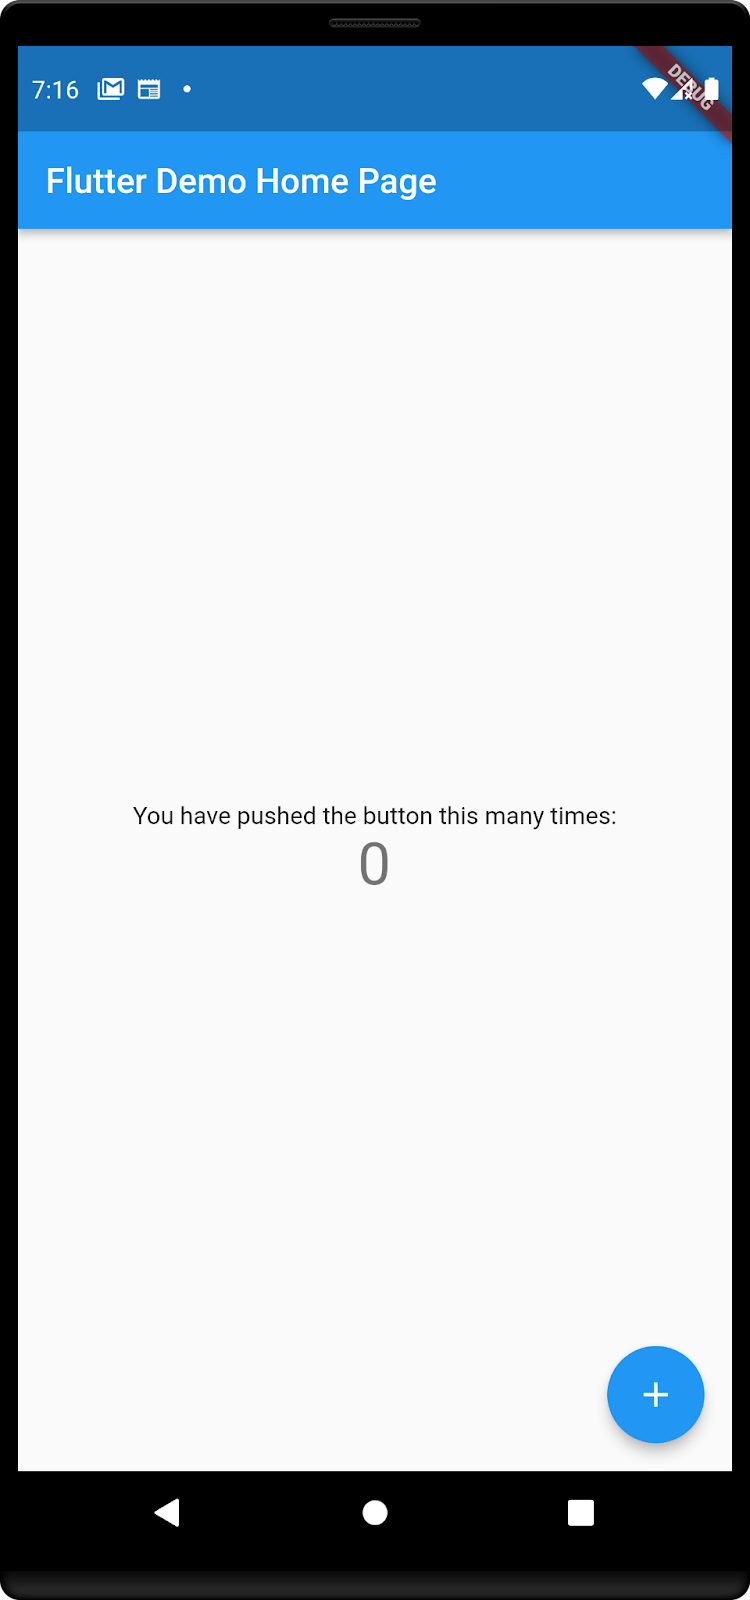
This should create the Flutter demo counter application. You can run the application by navigating to feature_flag_example and running:
Make sure you have a simulator running or a device connected first.
Our app should look like this:
Step 2: Setting up Flagsmith for your Flutter feature flag
After signing up for a free account at Flagsmith, we need to create a project. To do so click the “Create Project” button on the dashboard:
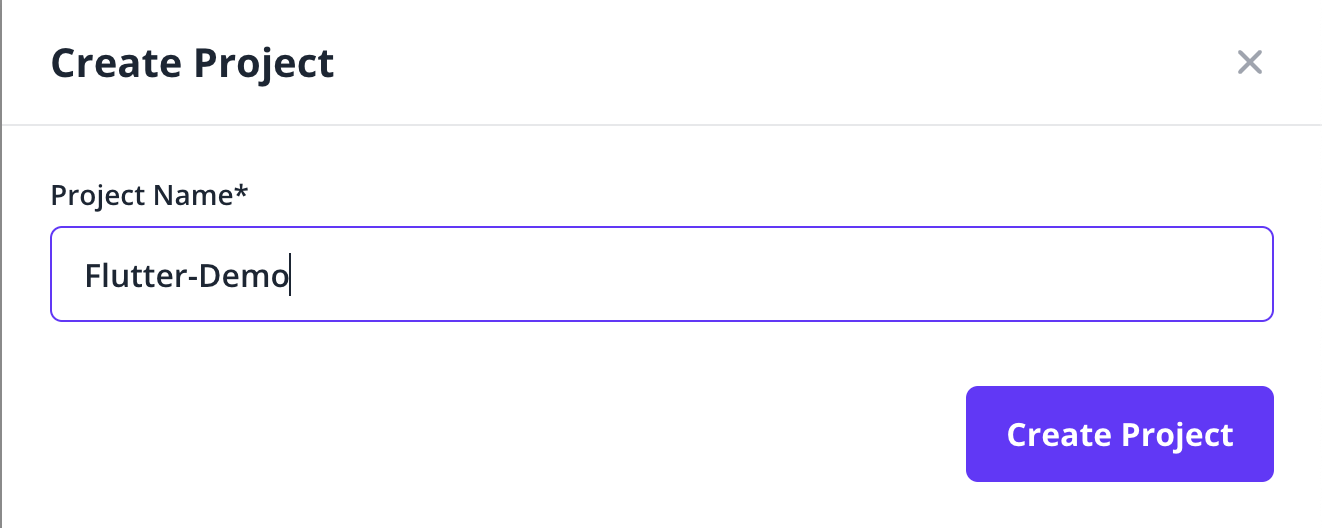
The project for our Flutter app has been named “Flutter-Demo” and we should see the project page for this Flutter feature flags example as follows:

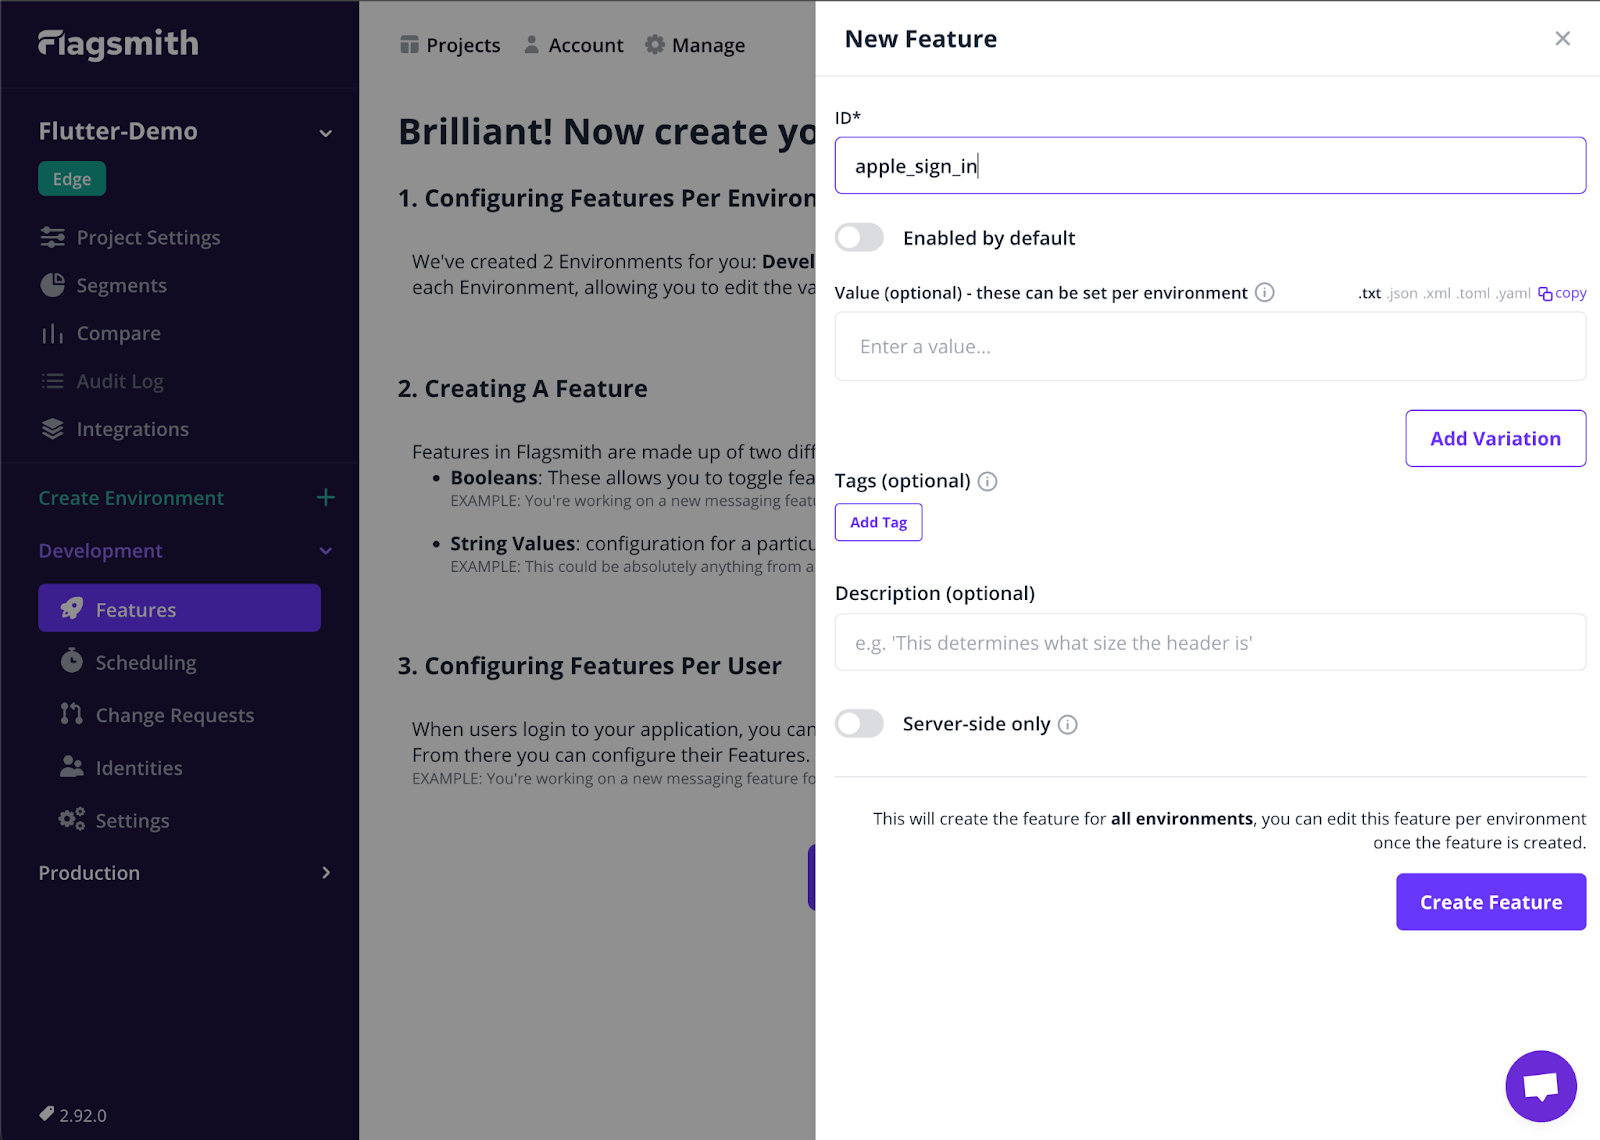
Now, let’s create our first feature flag by clicking on the “Create your first feature” button. We’ll call this feature apple_sign_in as shown below:
Now we have everything ready for feature flag management, let's dive into the code.
Coding
Step 1: Install required packages
At the root of the app directory open the file pubspec.yaml we will add two dependencies
1- flagsmith to provide feature flag functionality
2- sign_in_button (optional) provides pre-styled sign-in buttons
Your dependencies section should look like this:
dependencies:
flutter:
sdk: flutter
flagsmith:
flutter_signin_button: ^3.0.0
To install the dependencies run flutter pub get
Step 2: Adding the feature flag to the app
In this article, we are only going to change the contents of the `lib/main.dart` file. First things first, let us clean up the page by removing the counter code inside the _MyHomePageState’ class “lines 51 -> 63”.
Now we need to import our packages. Add the following lines to the top of the file:
Next, let’s replace the “build” function inside the _MyHomePageState class with the following:
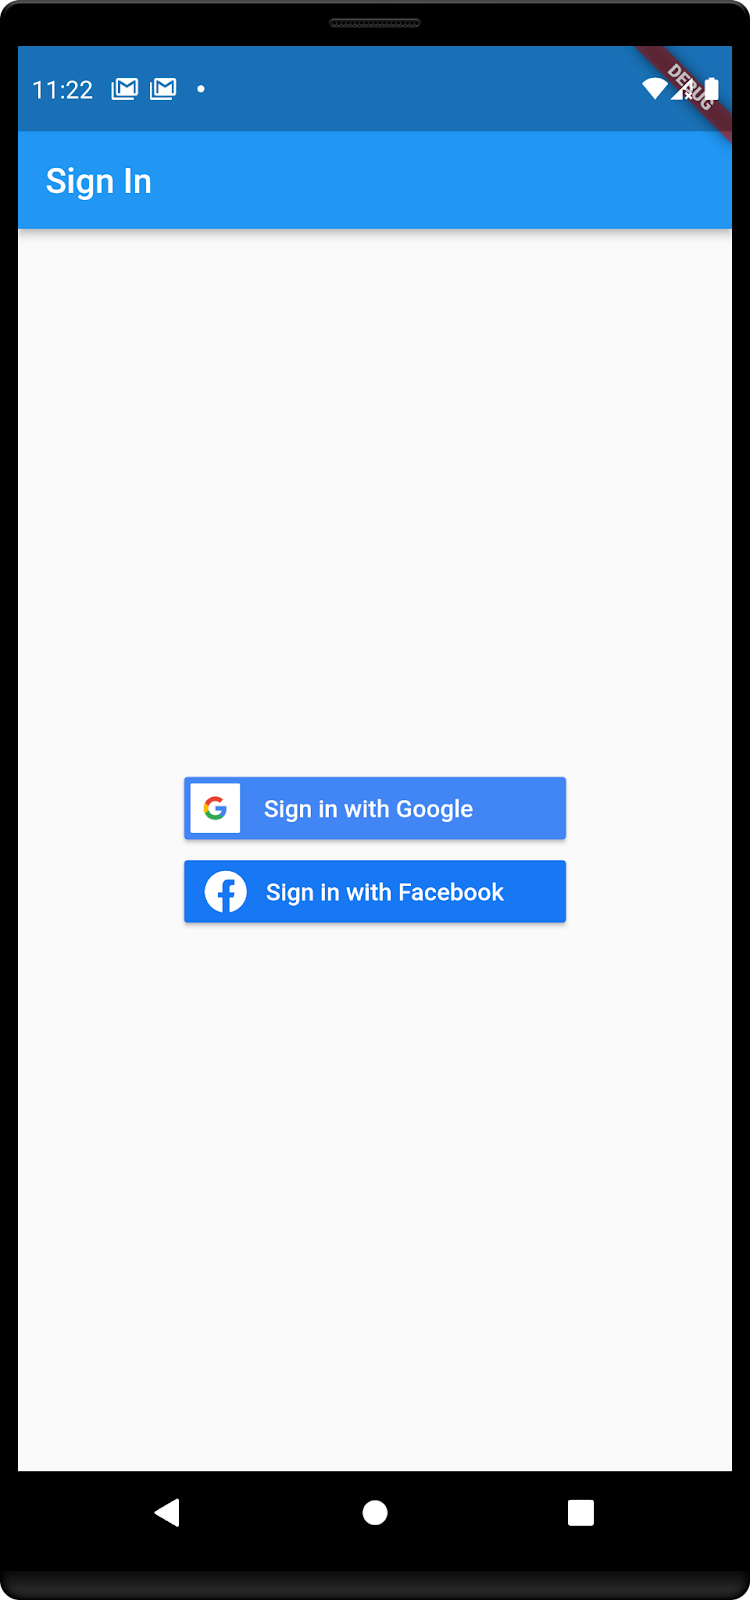
This uses the “SignInButton” widget to display Google and Facebook sign in buttons, your app should now look like this:
Now that we have got this ready, it’s time to set up Flagsmith in our app. Inside our _MyHomePageState class, we will initialize the Flagsmith client as shown below:
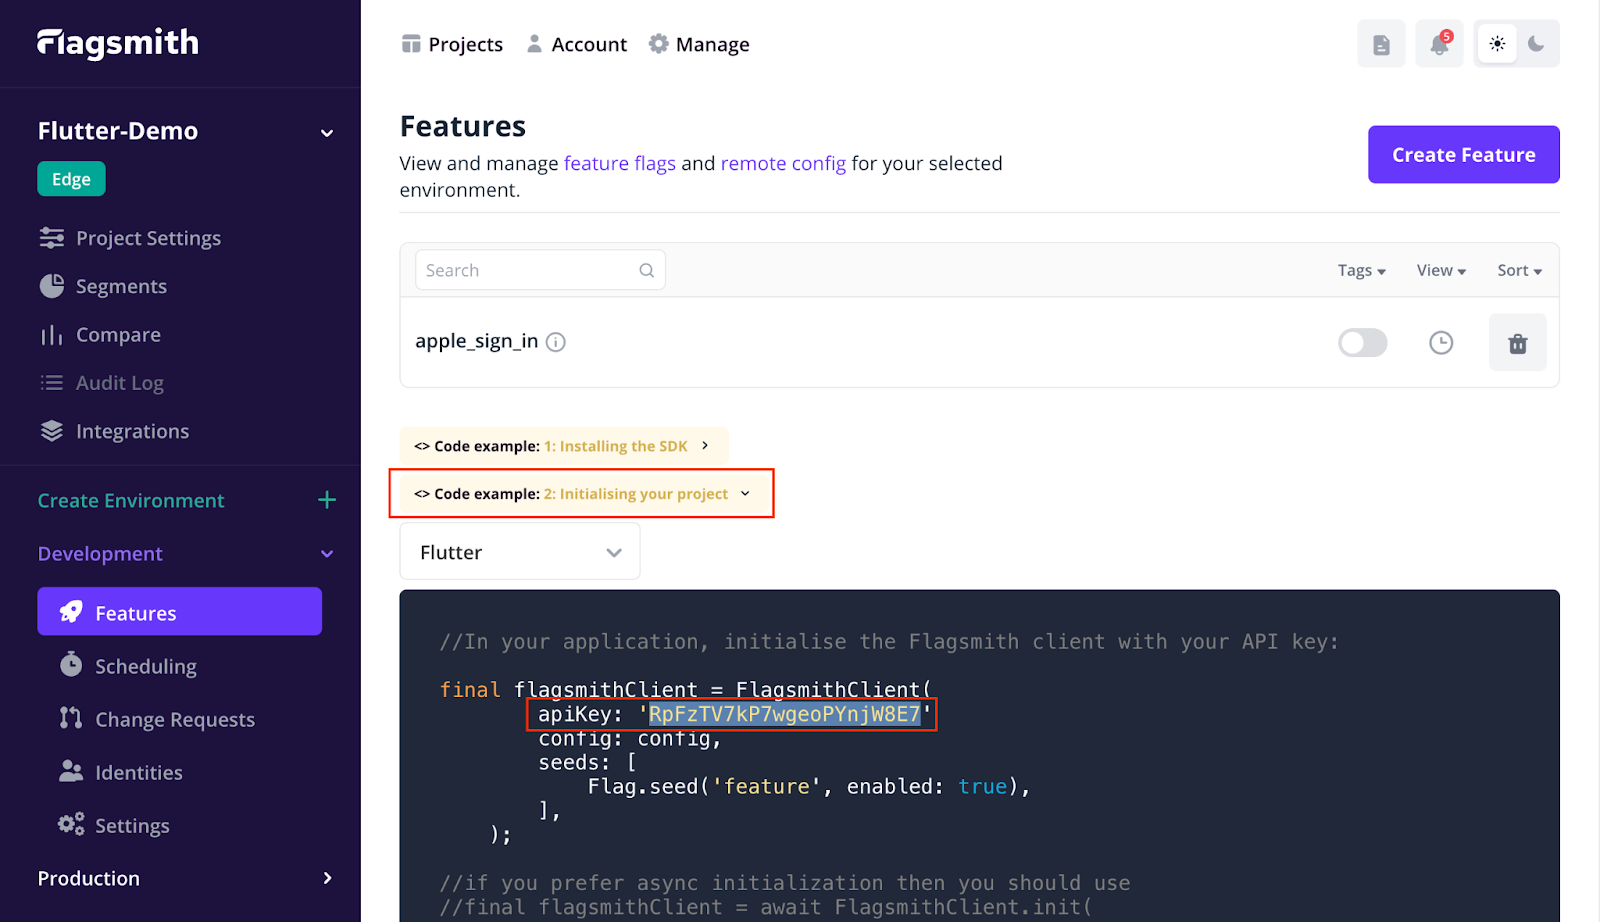
We can find your apiKey in the “Initialising your project” section of the feature flag page as shown below, or in the environment settings:
Our next step is to use the feature flag to determine if Apple sign in should be enabled or not. Add the following function to our class:
This function returns a boolean value that is determined by the “apple_sign_in” feature flag. Now the final step is to use this value to render the Apple sign in button, for this we will use the “FutureBuilder” widget like so:
FutureBuilder(
future: appleSignIn(),
builder: (BuildContext context, AsyncSnapshot snapshot) {
if (snapshot.data != null && snapshot.data == true) {
return SignInButton(Buttons.apple, onPressed: () {});
} else {
return Container();
}
}),
After adding this widget to the “Column” children our final “build” function should have the following content:
Widget build(BuildContext context) {
return Scaffold(
appBar: AppBar(
title: const Text("Sign In"),
),
body: Center(
child: Column(
mainAxisAlignment: MainAxisAlignment.center,
children: [
SignInButton(
Buttons.googleDark,
onPressed: () {},
),
SignInButton(
Buttons.facebookNew,
onPressed: () {},
),
FutureBuilder(
future: appleSignIn(),
builder: (BuildContext context, AsyncSnapshot snapshot) {
if (snapshot.data != null && snapshot.data == true) {
return SignInButton(Buttons.apple, onPressed: () {});
} else {
return Container();
}
}),
],
)),
);
}
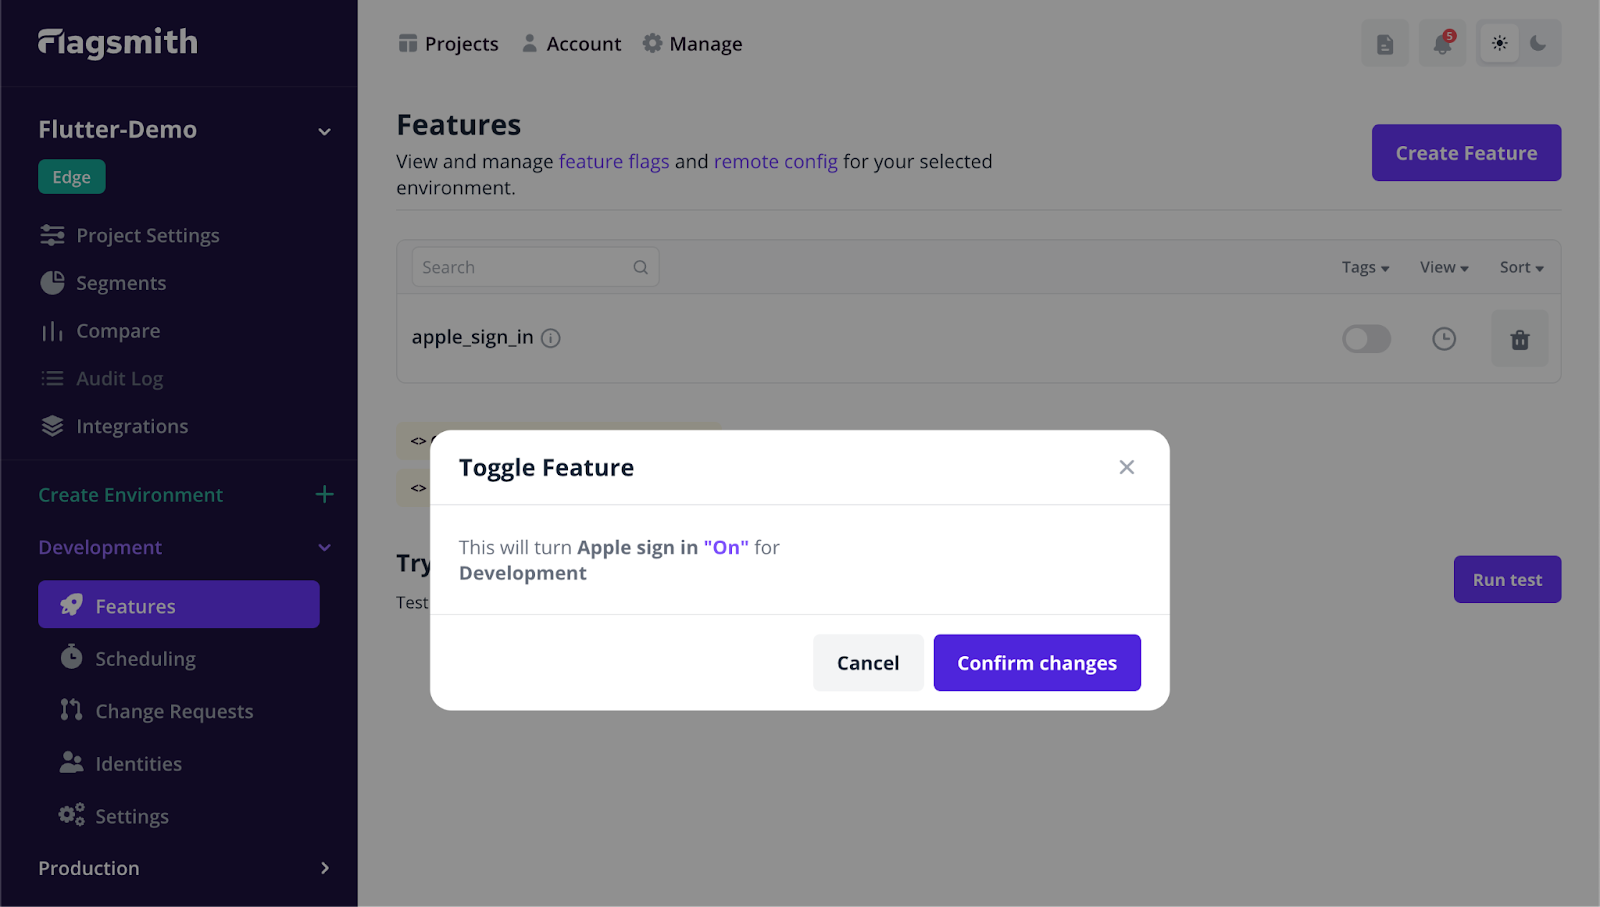
Step 3: Testing the Feature Flag
We currently have the apple_sign_in flag turned off so you should not see any changes in the app. To turn the flag on, go to the Flagsmith dashboard and click on the switch next to the flag, then confirm changes as shown below:
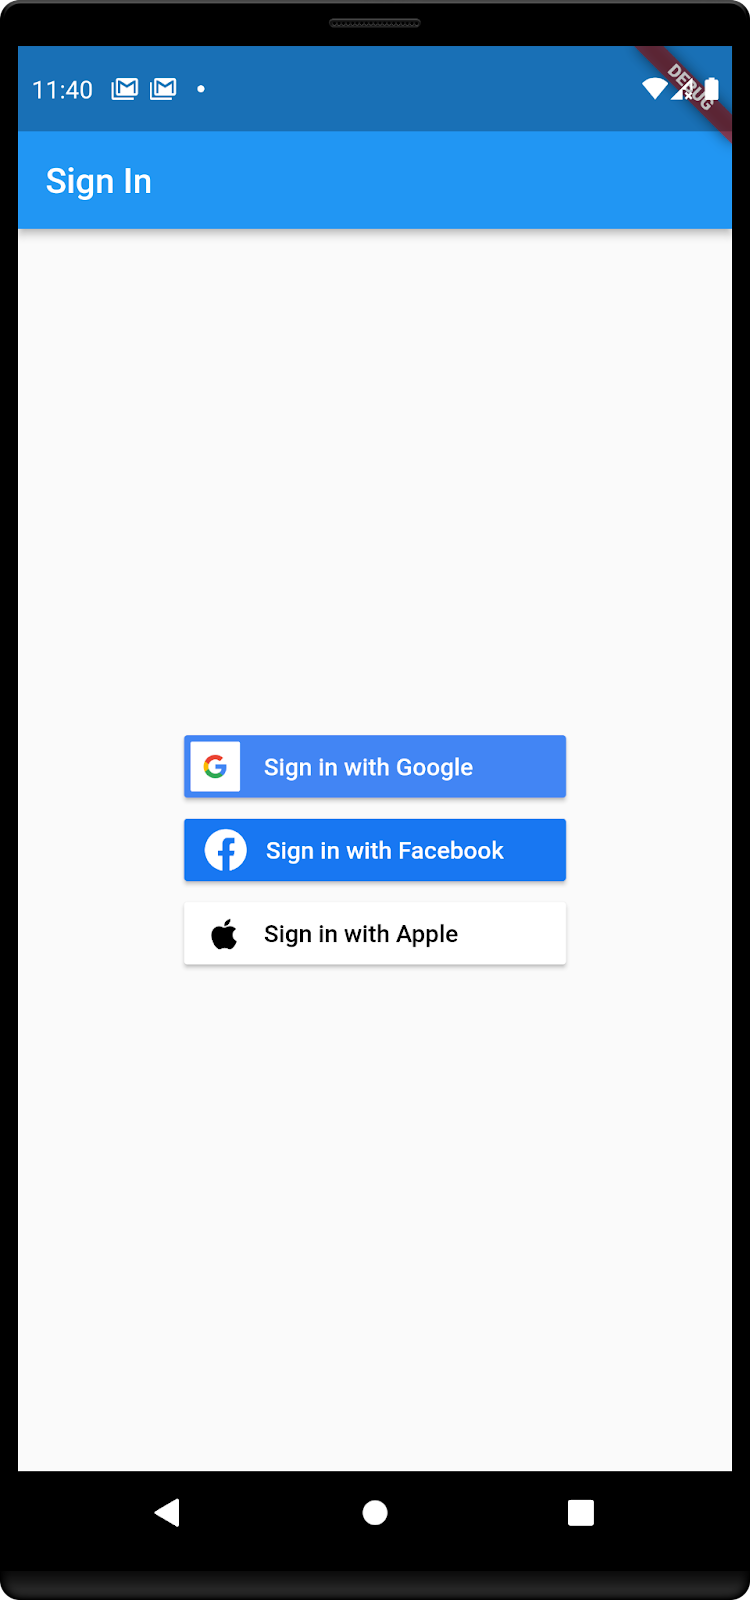
Now restart the application by typing ‘R’ in the terminal and your app should look like this:
Conclusion
We just saw how to implement Flutter feature flags on a simple login screen. This idea can be easily implemented in any application. Feature release can be done safely with high confidence and in a short time to turn on or off the released feature without the need to release any new code.
The main benefit is that the feature has been deployed safely. If there are any issues, the feature can be turned on or off instantly and safely, and there’s no need to resubmit the app to Apple or Google and wait for a review and update.
This guide demonstrates the power of feature flags with the simple task of enabling and disabling a button, but the possibilities are endless. You can also expand the use of feature flags to beyond booleans; they can also carry values such as strings for more control. Get that power in your hands and start using Flagsmith now!
More Reading
If you like this Flutter feature flags guide, check out our Flutter SDK or read some of our other how-to guides:
- Java feature flags
- PHP feature flags
- Swift feature flags
- Angular feature flags
- Node.js feature flags
- React Native feature flags
Flutter feature flag FAQs
What is the best tool to use to manage Flutter feature flags?
The most common tool developers reach for in this space is Firebase Remote Config, which works reasonably well for basic key/value remote config within a Firebase project. However, Firebase Remote Config is a remote config tool first—not a purpose-built feature flag management platform.
It lacks things like offline support, per-user or per-environment targeting, analytics around flag evaluations, and clean SDK support across every platform your Flutter app runs on. A dedicated feature flag SDK, like Flagsmith's Flutter package, handles initialization via a straightforward init method, applies default values gracefully when the API is unreachable, and persists flag state locally so your app behaves predictably even when connectivity drops.
How do I manage feature flags in Dart?
When it comes to Dart, the setup with a feature flag management platform like Flagsmith is simple. You add the Flagsmith package to your dependencies, import it, and call the async init method during app startup.
From there, any widget—whether that's a return Scaffold, a const Text label, or an entire login screen—can be wrapped in a conditional that reads the flag's bool value from your FlagsmithClient instance.
That single client handles state management, API calls, and error handling, giving developers clean access and control across every environment in the project. It's a small overhead that pays for itself the first time you need to instantly fix and kill a buggy feature in production—or roll out a new feature to a defined subset of users before committing to a full release.


.png)
.png)

.png)

.png)


.png)


.png)


.webp)