
React Native Remote Config: A Step-by-Step Implementation Guide


This tutorial will walk through updating your application using React Native remote config. With feature flags, we can turn a feature on or off without the need to deploy. In addition to that, with a remote config, we can add and remove things within a feature that helps us exploit the true power of feature flags with Flagsmith. Mobile apps are one of the best candidates for a remote config as we have less control over when they are deployed.
Before we get into the details, we should probably give a top-level overview of feature flags, React Native and remote config
What are feature flags?
Feature flags (or feature toggles) are “switches” that turn the functionality of certain feature(s) on or off without having to alter code or redeploy.
What is React Native?
React Native is an open-source framework created by Facebook that lets you build native mobile apps using JavaScript and React. One of React Native's main advantages is that it compiles JavaScript code to native components, giving apps the performance as well as the look-and-feel of native apps so you can use a single codebase to create apps for both iOS and Android.
What is remote config?
Remote config (shortened from remote configuration), is a technique within software development that enables developers and engineers to adjust features within a mobile application remotely. This means they can apply updates or fixes without having to release a full update or releasing a new version to the relevant app store.
What are the advantages of remote config in your React Native app?
Remote config is the icing on the feature flag cake, below are some notable advantages of remote config:
- Ability to change parts of a feature without needing to deploy any new code.
- Dynamically change how a feature behaves on the fly even for static clients like mobile applications.
- Similar to feature flags they can be turned on and off as per the need.
It would be great for you to know the advantages of using feature flags too. Next up we will briefly discuss the example app we will use for the remote config demo.
Example: Control the theme options with Remote config
For this step-by-step walkthrough, we will take a demo React Native/Expo app and add a remote config to control the theme options we want to show on the home screen. A mobile app serves as one of the best candidates for a remote config as we have less control over when it is deployed. Pairing this setup with the React Native Performance Monitor will give you insights into how these dynamic changes impact your app's performance, allowing for more informed decisions.
A web app can be deployed and the most recent changes reflect on all clients on a page refresh. On the contrary, with a mobile app, the app stores have to approve the app, and the customer has to download the latest version to get the latest changes. There are ways to do dynamic code push in both Android and iOS but they are not as easy as a remote config. With a remote config, it is as easy as editing 2 lines, hit the “Update Feature” button on Flagsmith, reload the application or wait for a few seconds and done. Let’s see how that is done with a React Native application example.
Prerequisites
Before we jump into the code, here are some prerequisites for us to be aware of:
- You are aware of how JavaScript, React Native, and Expo generally works. By the way, we've interviewed Charlie Cheever, the founder of Expo.
- Have Node.js and Yarn running on your system.
- You know how to use Git and GitHub in general.
- You know that mobile apps are static clients, meaning the application publishers don’t have control over when the user will update their local application to a newer version.
- You have a working Flagsmith account and have created a feature flag and played around a bit with it. If you have not done that please read this deployment is not a release step by step example post.
Thankfully, this project will run on a web browser so there is no need to install an emulator. If you want to test out any Android or iOS emulator you can do that too.
After you have the above things sorted out, we can proceed to the next step.
Making the demo app work
We will be using an expo multi-screen started demo app which is open source. To get this app working locally as a web application we can do the following:
- Make sure you have the expo CLI installed with `npm install -g expo-cli`
- Clone the repository with `git clone git@github.com:calebnance/expo-multi-screen-starter.git`
- Then go into the folder with `cd export-multi-screen-starter`
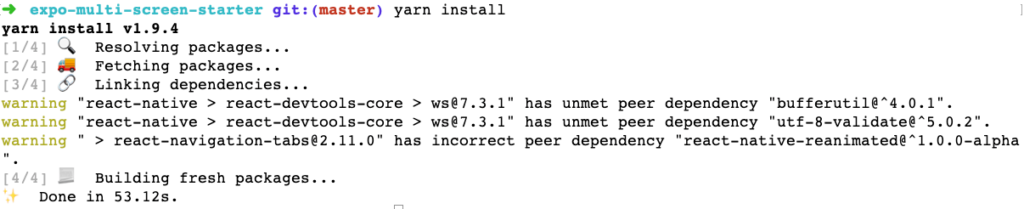
- After that run `yarn install`, it will download all the needed dependency; might take a couple of minutes depending on your internet connection, below is how it ran for me:
- Then run `yarn start`, it will open up your browser with the following screen:
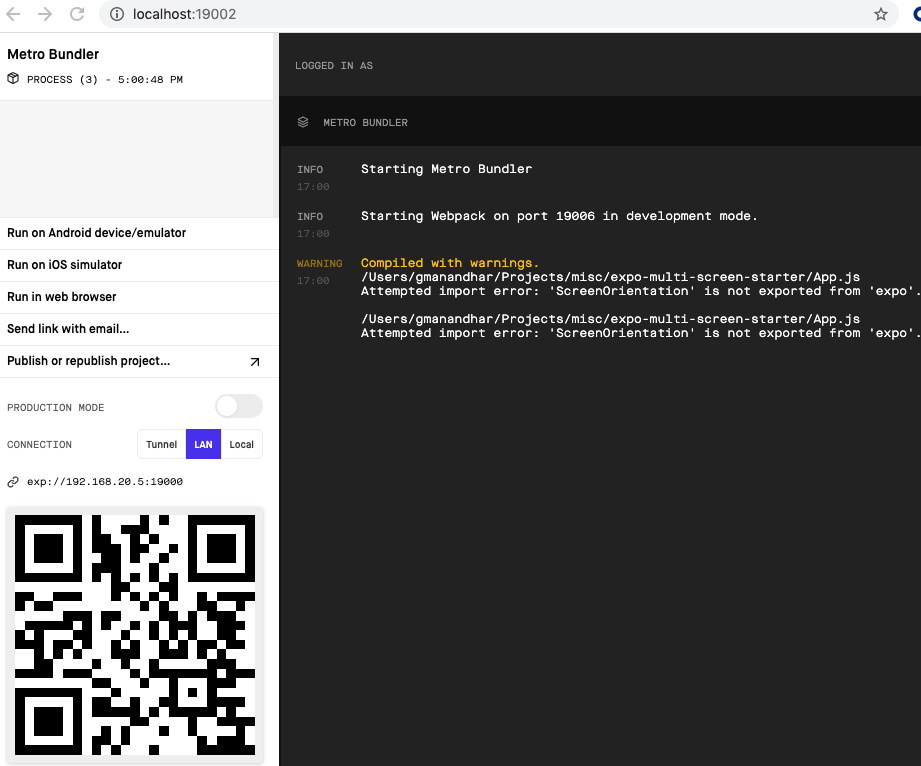
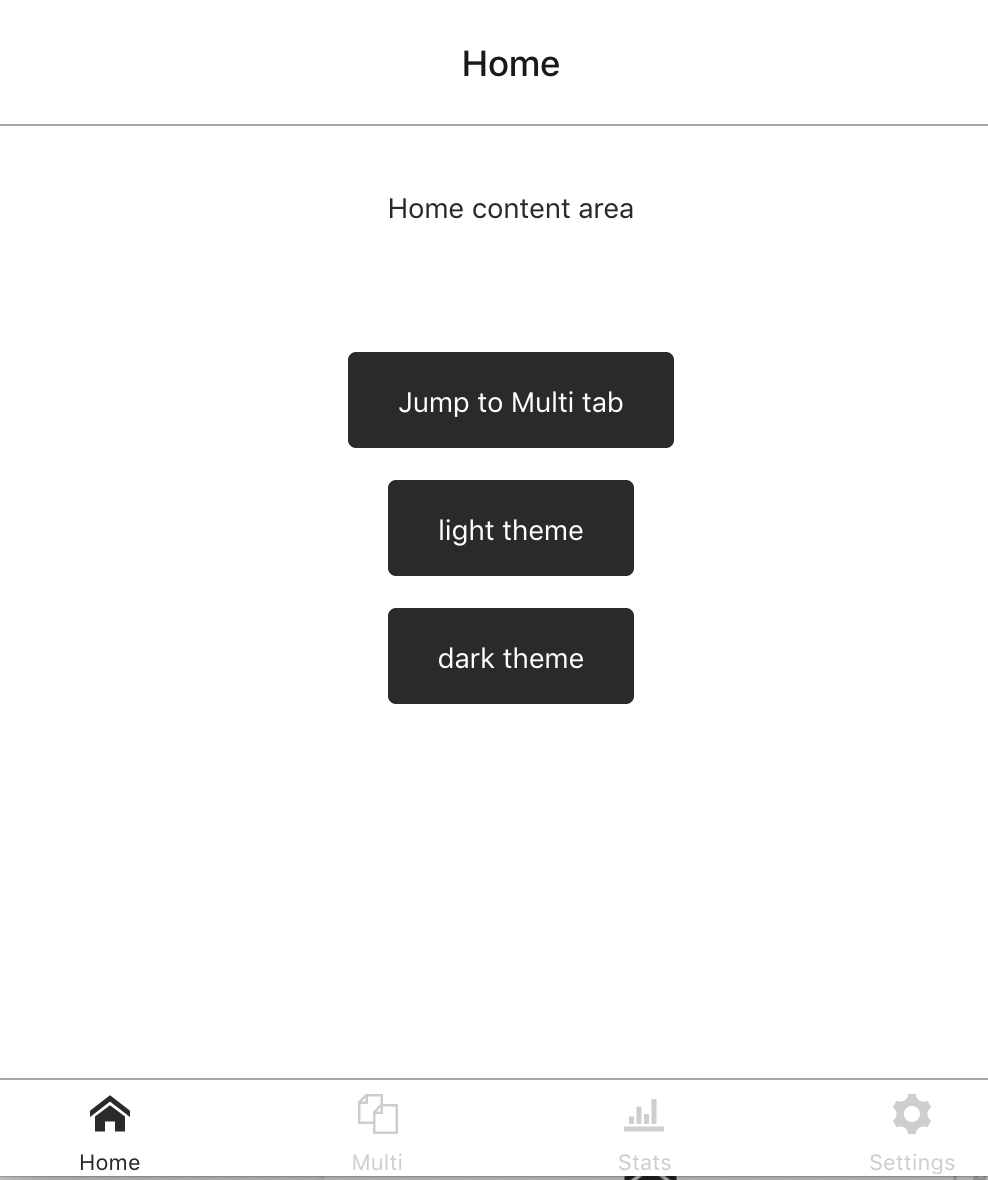
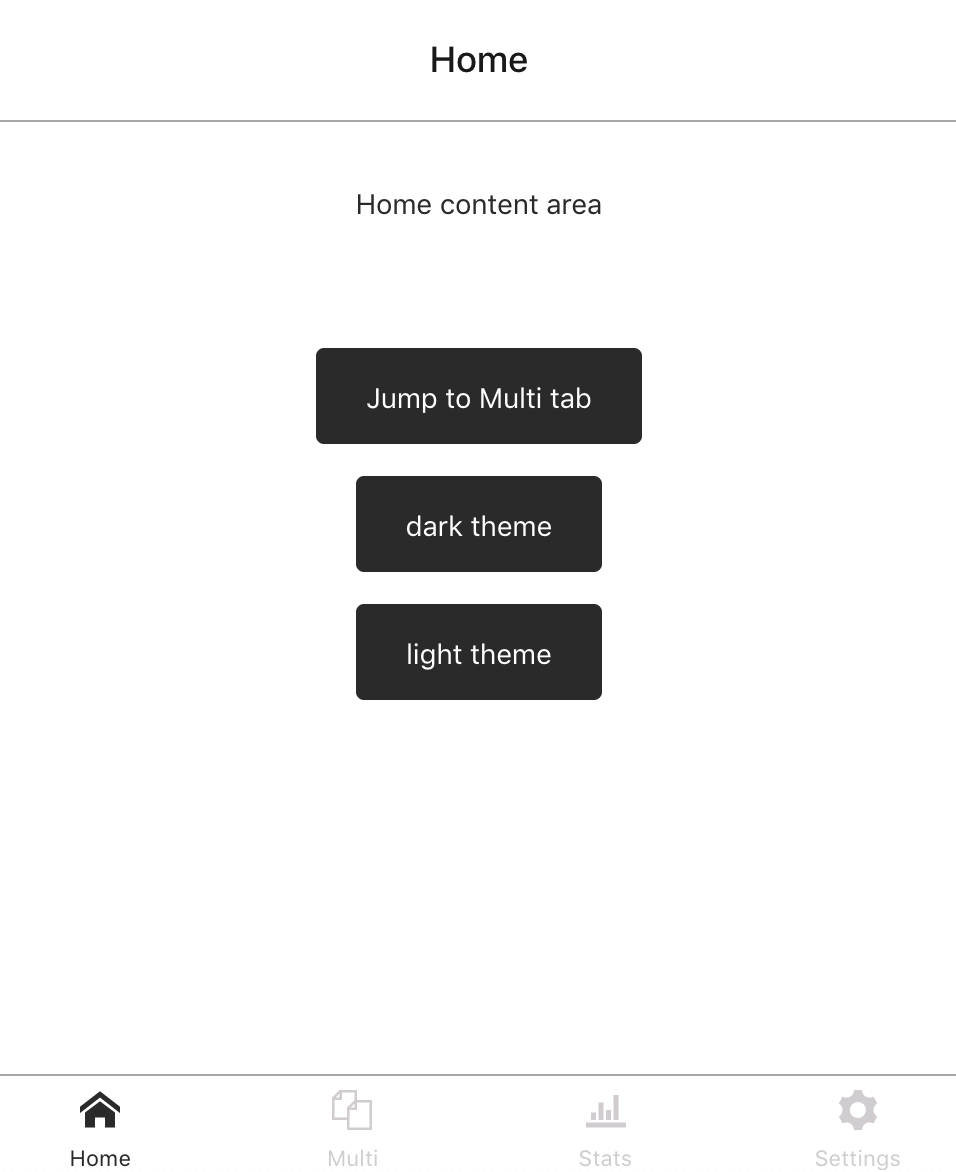
After that click “Run in web browser” it will start another tab with the app running which look like below:

Great! Up until this point we have our demo React Native Expo app running. You can close the tabs and stop the process for `npm start`, we will come back to it later.
Now the fun begins as we will create the remote config, integrate Flagsmith SDK and introduce the themes remote config to control how many themes we want to show, follow on:
Creating the react native remote config on Flagsmith
The goal here is to dynamically control the themes displayed on the main screen without the need to change any code or resubmit your application to any of the app stores. For this post, we assume you have already registered on Flagsmith and have played around to create your first feature flag on a project. Now, let's proceed to create our first remote config.
First login to your Flagsmith account, choose your project, and then click on Features under Development environment. Then click on “Create Feature” and fill up the details like below:
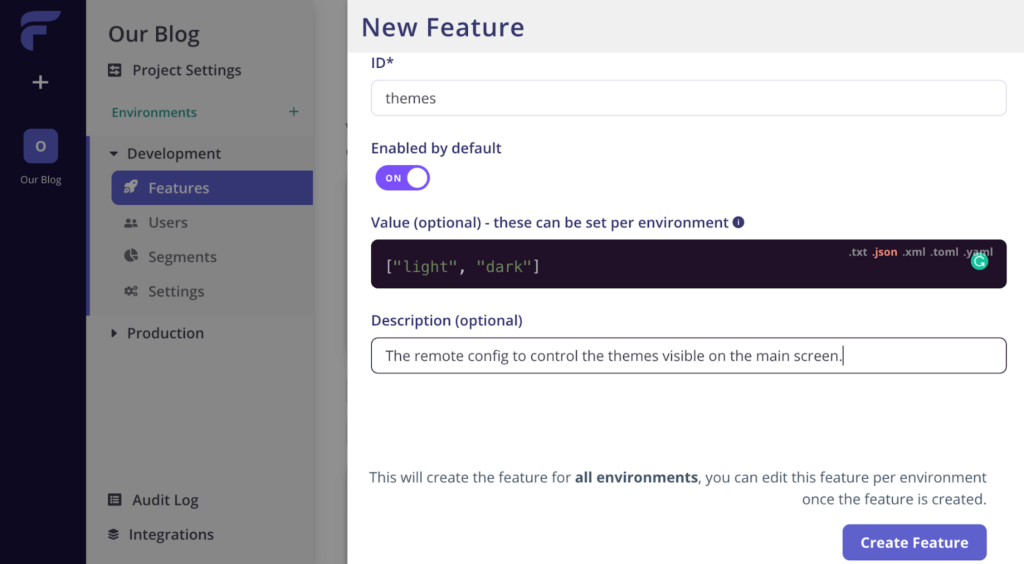
After that, click the “Create Feature” button. The main thing to take note of here is, we have added a value of a JSON array `[“light”, “dark”]` for the themes to show. Consequently, we will add the necessary library and code to use this remote config in our demo app.
>>Sign up for free and use remote config!
Add Flagsmith to the React Native app
As we have the remote config set up on our Flagsmith project and relevant environments, we will add two NPM packages react native flagsmith and react native async storage to the project with the following command:
```bash
yarn add react-native-flagsmith @react-native-community/async-storage
```
As the project is using yarn, we are also using yarn to install these packages. If your project uses NPM you can run an equivalent `npm -i --save` to install these packages to the project.
After we have the needed libraries we will change the code to introduce the themes remote config.
Enable react native remote config in our demo app
To add the remote config to our demo react native expo we will change the `App.js` file on the root of the project to look like below:
```js
import * as React from 'react';
import { StatusBar } from 'react-native';
import { ScreenOrientation } from 'expo';
import AppLoading from 'expo-app-loading';
import { Appearance } from 'react-native-appearance';
import { device, func } from './src/constants';
import flagsmith from 'react-native-flagsmith';
// tab navigator
import Stack from './src/navigation/Stack';
import AsyncStorage from '@react-native-community/async-storage';
const environmentID = "nzSwVvSBKPXat8gM6guipa";
class App extends React.Component {
constructor(props) {
super(props);
this.state = {
isLoading: true,
theme: 'light'
};
// is iPad?
if (device.isPad) {
ScreenOrientation.allowAsync(
ScreenOrientation.Orientation.ALL_BUT_UPSIDE_DOWN
);
}
this.updateTheme = this.updateTheme.bind(this);
}
componentDidMount() {
const { handleFlags, handleFlagsError } = this;
flagsmith.init({
environmentID,
cacheFlags: true,
AsyncStorage,
enableLogs: false,
onChange: handleFlags,
onError: handleFlagsError
});
flagsmith.startListening(12000);
// get system preference
const colorScheme = Appearance.getColorScheme();
// if light or dark
if (colorScheme !== 'no-preference') {
this.setState({
theme: colorScheme
});
}
}
updateTheme(themeType) {
this.setState({
theme: themeType
});
}
render() {
const { isLoading, theme } = this.state;
const iOSStatusType = theme === 'light' ? 'dark-content' : 'light-content';
let themes = ['light'];
if (flagsmith.hasFeature('themes')) {
themes = JSON.parse(flagsmith.getValue('themes'));
}
if (isLoading) {
return (
<AppLoading
onError={console.warn}
onFinish={() => this.setState({ isLoading: false })}
startAsync={func.loadAssetsAsync}
/>
);
}
return (
<React.Fragment>
<StatusBar barStyle={device.iOS ? iOSStatusType : 'light-content'} />
<Stack
screenProps={{
updateTheme: this.updateTheme,
themes
}}
theme={theme}
/>
</React.Fragment>
);
}
handleFlags = (oldFlags, params) => {
this.setState({
...params,
isLoading: false,
logs: [{
timestamp: new Date().toTimeString(),
params: JSON.stringify(params),
oldData: JSON.stringify(oldFlags),
data: JSON.stringify(flagsmith.getAllFlags()),
}].concat(this.state.logs)
});
};
handleFlagsError = (data) => {
console.log('Error getting feature flags', data);
};
}
export default App;
```
The main changes here are discussed below:
- We imported `react-native-flagsmith` on line no. 7 and `async-storage` in line 12.
- On line no. 13, we added the environment ID, we can conveniently find it in the Features page on Flagsmith in the “Code Example” section.
- From line no. 35 to 45, we have initialized the Flagsmith client inside `componentDidMount`, We have enabled the cache and disable the logs. Then attached `onChange` and `onError` handlers.
- The `startListening` part of Flagsmith polls the API for any changes and passed the value in milliseconds so it will poll the API every 12 seconds for any change. You can read more about this in our docs too.
- At line 66, we initialize the `themes` array with `light`, just in case if the Flagsmith API can’t be reached we will still have one theme. Next, we check if the themes remote config is enabled, if it is we will parse the JSON value into the themes variable. In our case, it will be an array with two elements, light and dark.
- On line 88, we pass the themes array to the Stack component’s screenProps.
- Finally, on lines 95-100 we define the change and error handler. The error handler at the bottom is very basic which just logs the error on the console. The onChange handler does the main part of setting the state with the right parameters.
The other file we have to change is `src/screens/HomeScreen.js`, it looks as follows after our changes are done:
```js
import * as React from 'react';
import PropTypes from 'prop-types';
import { ScrollView, Text, View } from 'react-native';
import { useTheme } from 'react-navigation';
import { gStyle } from '../constants';
// components
import Touch from '../components/Touch';
const HomeScreen = ({ navigation, screenProps }) => {
const theme = useTheme();
return (
<View style={gStyle.container[theme]}>
<ScrollView contentContainerStyle={gStyle.contentContainer}>
<Text style={gStyle.text[theme]}>Home content area</Text>
<View style={gStyle.spacer64} />
<Touch
onPress={() => navigation.navigate('MultiBase')}
text="Jump to Multi tab"
/>
{Array.isArray(screenProps.themes) && screenProps.themes.map(theme =><Touch key={theme} onPress={() => screenProps.updateTheme(theme)} text={theme + ' theme'} />)}
</ScrollView>
</View>
);
};
HomeScreen.navigationOptions = {
headerTitleStyle: gStyle.headerTitleStyle,
title: 'Home'
};
HomeScreen.propTypes = {
// required
navigation: PropTypes.object.isRequired,
screenProps: PropTypes.object.isRequired
};
export default HomeScreen;
```
The main change on the home screen is at line no 24, the static rendering of both light and dark themes has been replaced. It has been updated with a loop on the screenProps’ themes variable. This variable is an array whose value is fetched from the remote config in the App.js and passed into the home screen component. Thereby, any change made to the remote config on the Flagsmith interface reflects here within seconds.
You can view all the changes in this neatly organized pull request. Next up, we will test the code and see the magic of remote configs in action. This example is Javascript and React Native focused, but Flagsmith can be used with many other languages like Go, PHP, Python, Ruby, Flutter, Java, iOS, and others. Please do check out SDKs, we should be supporting your team’s language of choice. Next up we will test our code and see it run.
Test the remote config
As we have added the remote config, installed necessary NPM packages, and updated the code let’s see the remote config in action. To see it running we will run `yarn start` again after we have done the changes on your project to see something like:
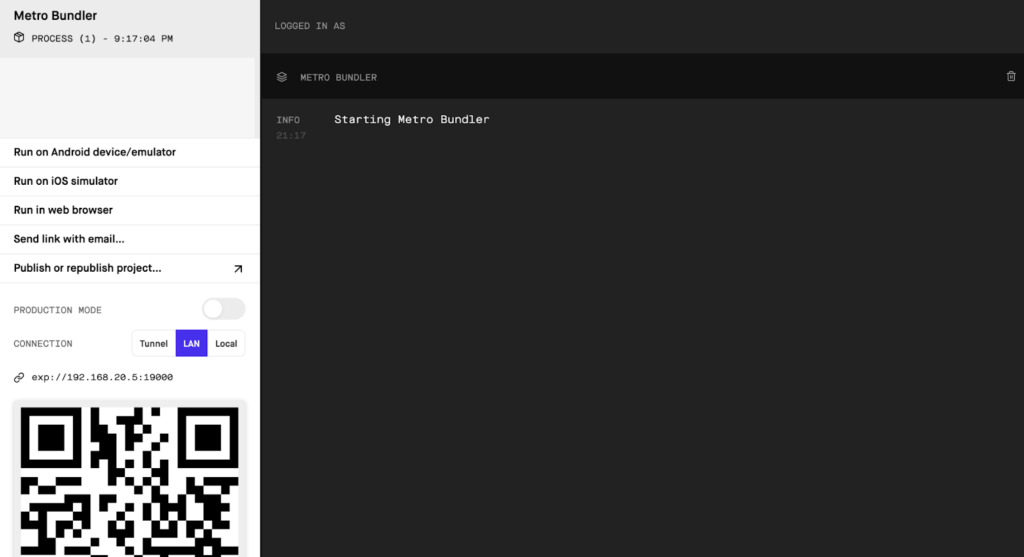
Subsequently, we will click “Run in web browser” on the above screen or you can also hit `w` on your CLI process, to see our app running as follows:
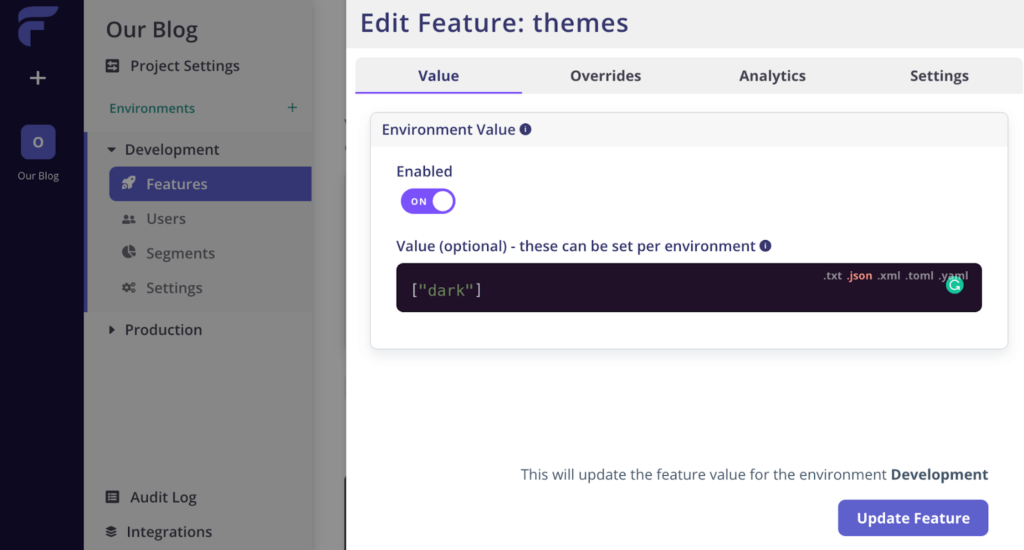
The crux of the matter is at this point, we will change the themes remote config on Flagsmith to show only the dark theme. To do this click the “themes” feature flag/remote config on the features page of your Flagsmith project we created earlier and change it as follows:
>>Sing up for free and use remote config!
Then click the “Update Feature” button, now if you come back to the running application you will see:

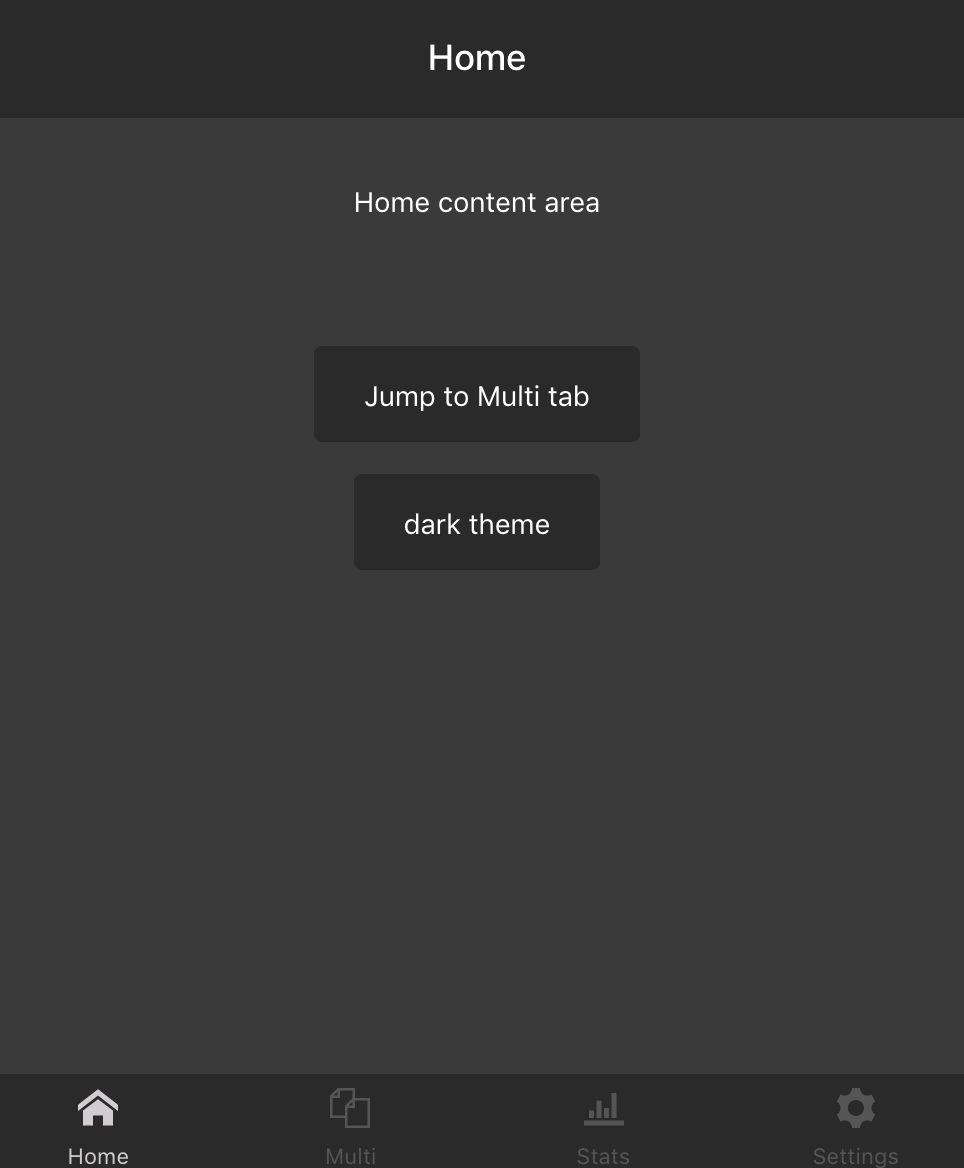
The remote config has worked well, we only see the “dark theme” button, just to make sure things are working fine you can click it to see if you change the theme, it did change the theme for me:
Subsequently, we can again add the “light” theme back to the remote config and update the feature. This time we will add the light theme after the dark theme which will look like `[“dark”, “light”]`. It will result in the app home screen looking as follows:
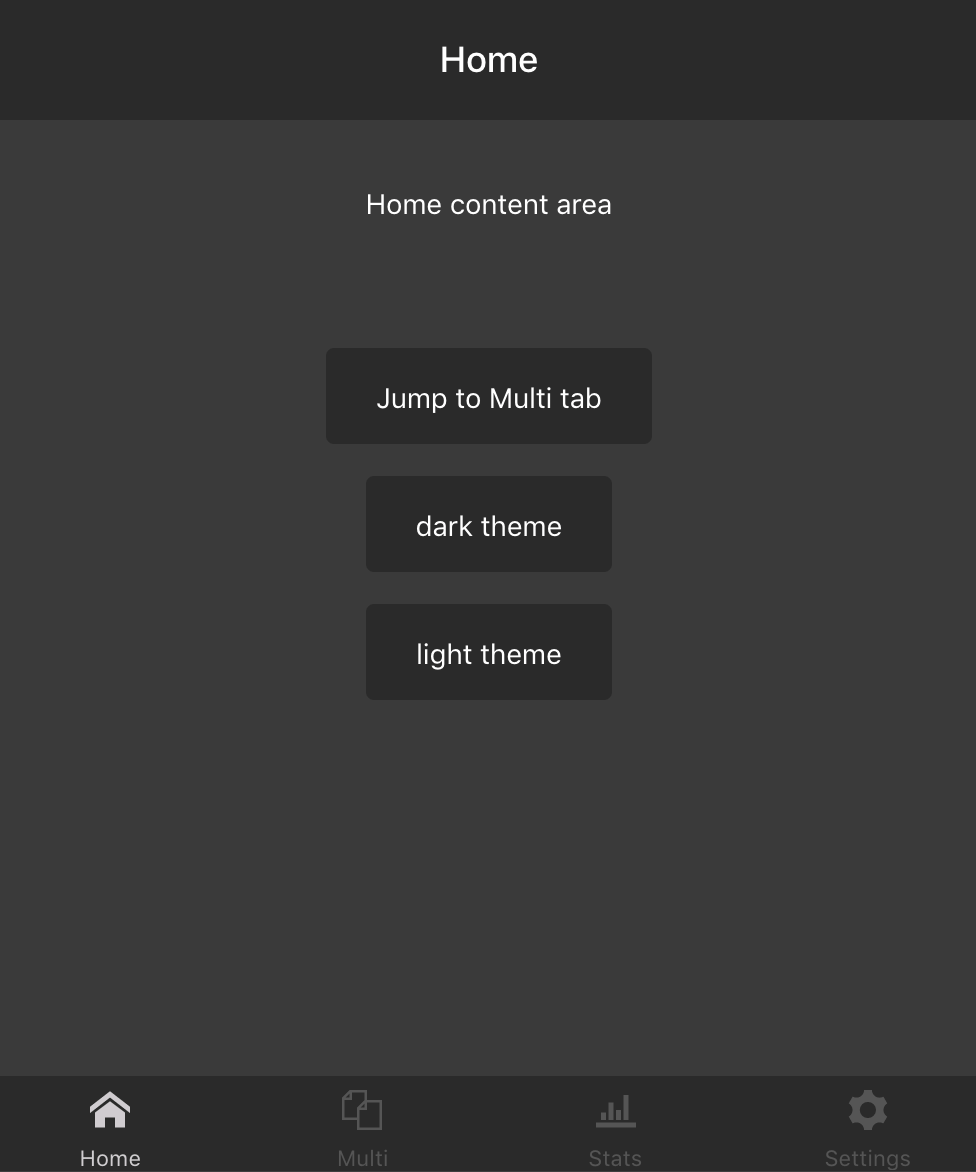
Notice it was “light theme” and then “dark theme” when we started and now it's “dark theme” at the beginning because that is how our array has it in the remote config on Flagsmith. You can again click the “light theme” button and your app will look like below:
As it is an array, we could control even the sequence of the themes easily. We could be playing around with this for a long time, but I sense you have got an idea of how useful and powerful the idea of remote config is by now.
Next Steps
This step-by-step React Native remote config guide is just scratching the surface, by now it is very clear that remote configs don’t need to be just a boolean flag like on and off. It can have string, array, or other kinds of values. The string could be used to change things like button colours on the fly and with a simple array, we just saw a usage to change the number of available themes. An array can be easily used to change for example the bottom navigation with a similar approach.
You can store virtually any public information like public API keys, Google Analytics ID, some advert ID, or pixel but beware not to store any private, sensitive, or confidential data on a remote config. As remote configs are not authenticated private information should never be stored in it.
React Native remote configs can open up a clear path to uncharted territory that you thought didn’t exist. Remote configs and feature flags help you test out things in unprecedented ways without the need for code changes, deployments, or even going through lengthy approval processes of app stores.
Conclusion
We have seen how to create a remote config to control the number of themes dynamically on a mobile app built with React Native and expo. I hope this has sparked multiple ideas for you that you want to try, maybe you want the main navigation of your application to be a remote config or the menu items a logged-in user can be changed without a need to change any code.
The possibilities are limitless, don’t bind yourself to the tedious processes, exploit remote configs and deliver amazing value to your customers. Start using remote configs today!
React Native and Flagsmith
To try out Flagsmith for React Native remote config and feature flagging, sign up for free here.
Flagsmith is free to start and is an open-source feature flag software. Open-source means more transparency, and the ability to look into the code and roadmap. We also offer flexible deployment options for self-hosted feature flags or deploying on-prem for full control over your flags and infrastructure.
More Reading
If you like this Java feature flags guide, check out our documentation or follow some of our other how-to guides:
- Java feature flags
- Python feature flags
- Ruby feature flags
- JavaScript feature flags
- Flutter feature flags
- Angular feature flags
- Spring Boot feature flags
- PHP feature flags
- Golang feature flags
- Kotlin/Android feature flags
- Swift feature flags
About the Author: Geshan Manandhar is a software engineer and blogger. Read more content on his personal blog.


OpenTelemetry, without the vendor lock-in: Introducing full observability for Open Source and Self-Hosted Flagsmith customers


.png)
.png)

.png)

.png)


.png)


.webp)