
Golang Feature Flags: A Step-by-Step Implementation Guide with a Working application


An introduction to Golang feature flags
This article is a simple tutorial that demonstrates the enormous amount of power that feature flag software can add to your Golang application with very minimal integration steps.
This blog has 0 prerequisites, so we're covering everything from scratch. We will first build a basic Golang server application, then we will add Flagsmith feature flags (AKA feature toggles) to make it more robust and tolerant.
Before we dive deeper into how to set up Golang feature flags, we’ll start with a bit of background on what Golang is, what feature flags are and why you should consider using feature flags with languages such as Go.
What are feature flags?
Before we dive into the Golang feature flag development work, let’s first understand what feature flags are.
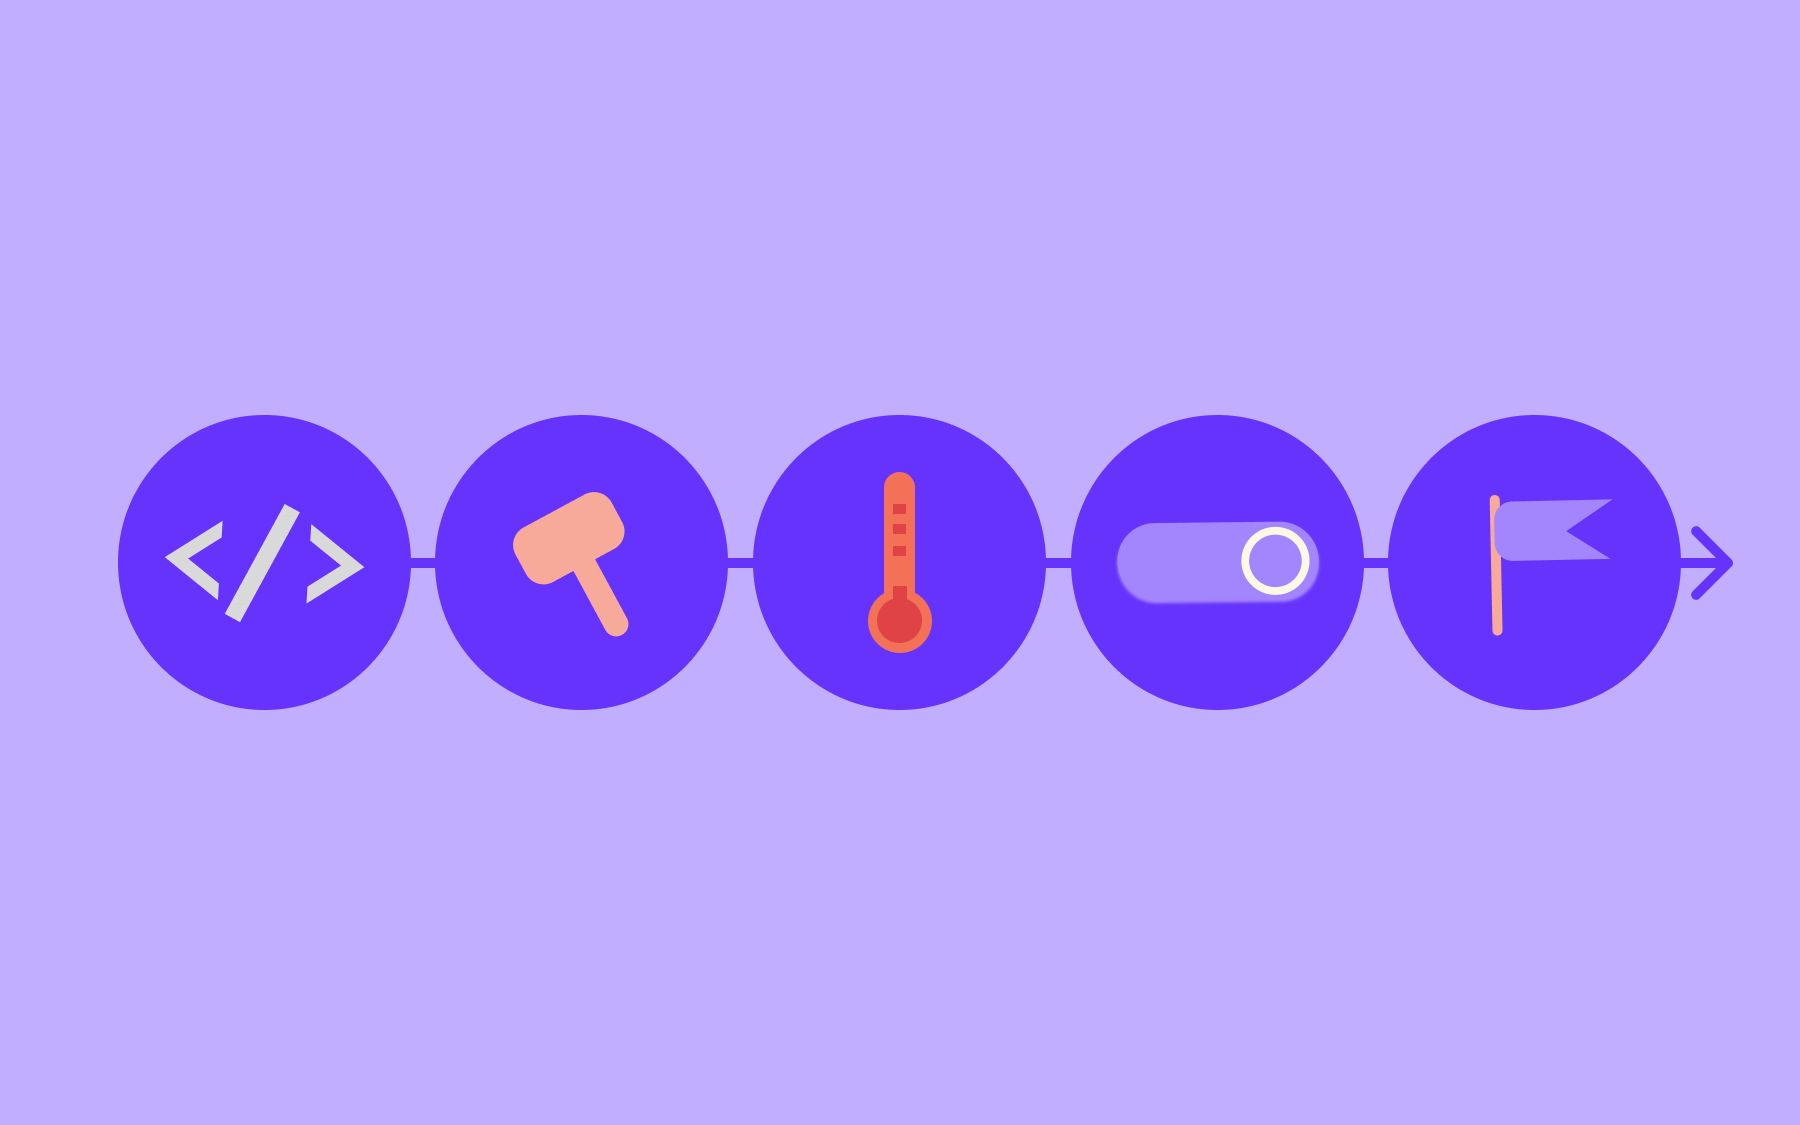
In simple words, a feature flag can be thought of as an electric switch (which operates an electric appliance). If the switch is turned on - the appliance would function as we expect it to.
When the switch is off - it will be in rest mode and won’t do anything i.e. it won’t consume any electricity and stop all its internal functionality. Analogously, in a computer application feature flags pause the system from making any computations, or external API calls, and make it return just a default response indicating that the application has been currently turned off.
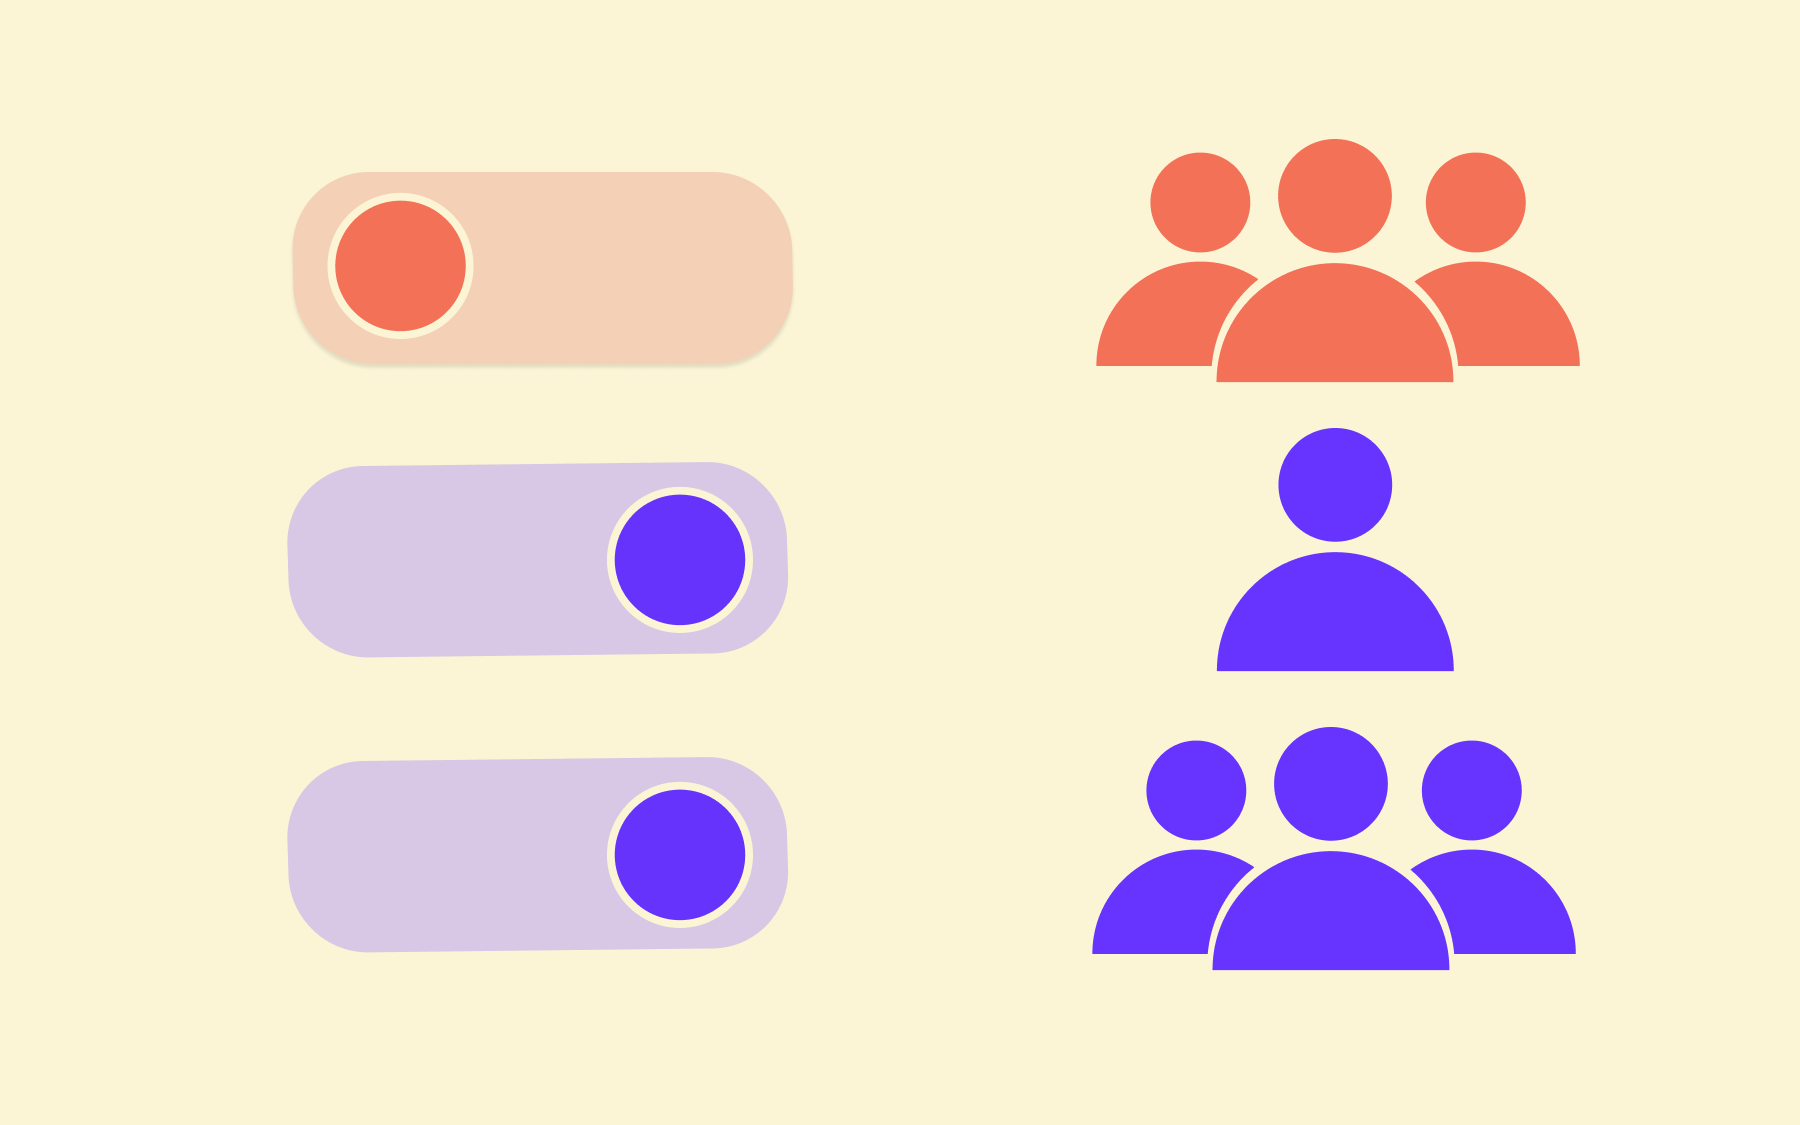
The above definition describes feature flags usage as a “kill-switch”. In addition to this, feature flags can add much more power by actually functioning as a non-binary tool, and allowing you to switch to different behaviors of the application as per the requirement. Likewise, an example in the real world would be the different modes of an air conditioner. Based on the weather you decide which mode to choose, similarly based on the user or any other external factors feature flags let you decide the application behavior.
Why should you use feature flags?
Let’s understand this through a very simple real-life example:
Imagine that your air conditioner is not cooling at all for the past 30 minutes. What would you do as a first thing? I’m sure you would turn it off (to save electricity, and prevent any unwanted damage) and call a technician for help. Otherwise you would be wasting your resources (electricity) and delivering a bad experience to all the members in the house. Once the mechanic fixes the issue, you would turn it back on.
This is exactly how a feature flag helps your application in case of any unexpected scenarios. It allows you to turn the malfunctioning component off and give developers the time to fix it behind the scenes. Once the issue is mitigated and fixed, it can be turned back on.
A question that may come to mind is:
“Why not just kill the application in such cases?”
It is never a good idea to kill the whole application for one bug. It offers a very bad customer experience, giving the impression that this application is not reliable and tolerant. Instead, displaying a simple message such as “We will be back soon” on the particular page will be much better, since the rest of the application still functions as normal.
Why Flagsmith?
It’s FREE! Flagsmith provides an all-in-one platform for developing, implementing, and managing your feature flags. It offers you the capability to leverage feature flags to their maximum potential by storing values inside them. These values can be used to toggle multiple kinds of behaviors as illustrated in the “What are Feature Flags” section.
Flagsmith is an open-source tool which makes it very trustworthy.
Flagsmith provides very seamless integration with well-maintained documents for multiple programming languages across web, mobile, and server-side applications. It offers various customizations which makes it very convenient to use.
Get started with Golang feature flags!
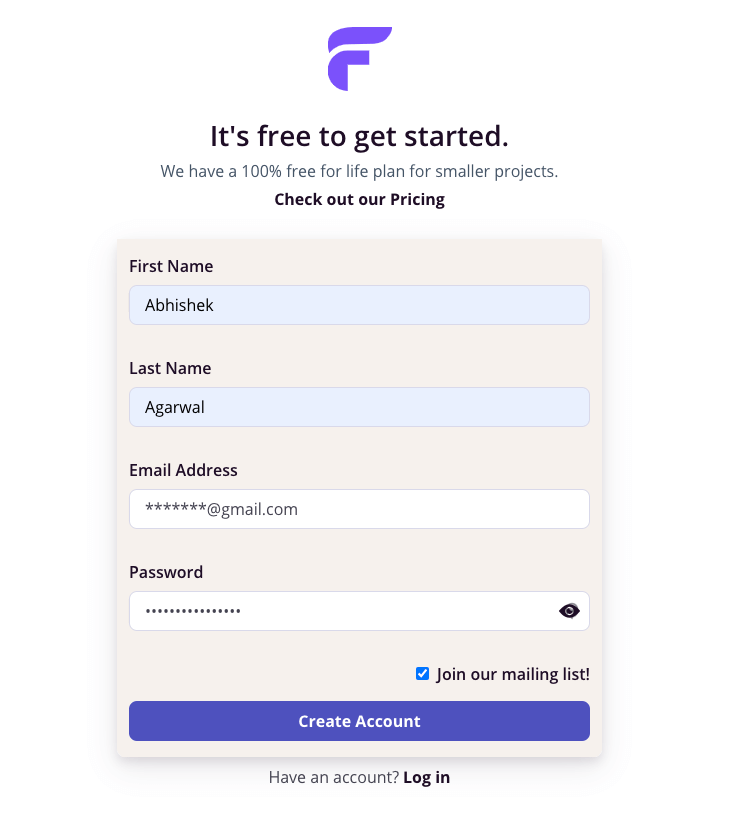
To create feature flags for an application built with Golang , we need to create an account on https://app.flagsmith.com/. It offers simple sign-in with Google or GitHub options. Or you can just fill in your basic details at https://app.flagsmith.com/signup. The below screenshot shows the signup process:
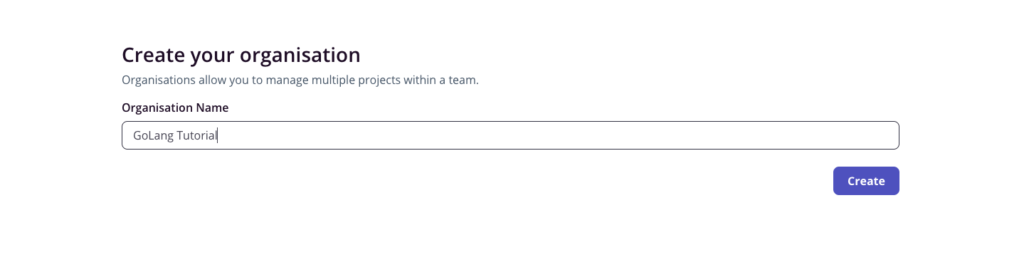
It will then ask you to create an organization. For the purpose of this tutorial, I’ll name it Golang Tutorial. You can name it anything you prefer.
Next, we need to create a project inside this organization:
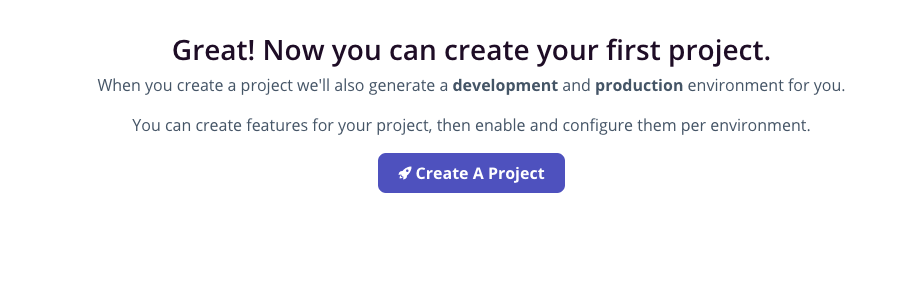
Click on “Create A Project”. The below screen should pop up. Enter your project name. I’m creating a project with the name “My Golang Server”. Feel free to name it as you want.

Congrats! You have already completed the Flagsmith setup process. You should see the below screen now.
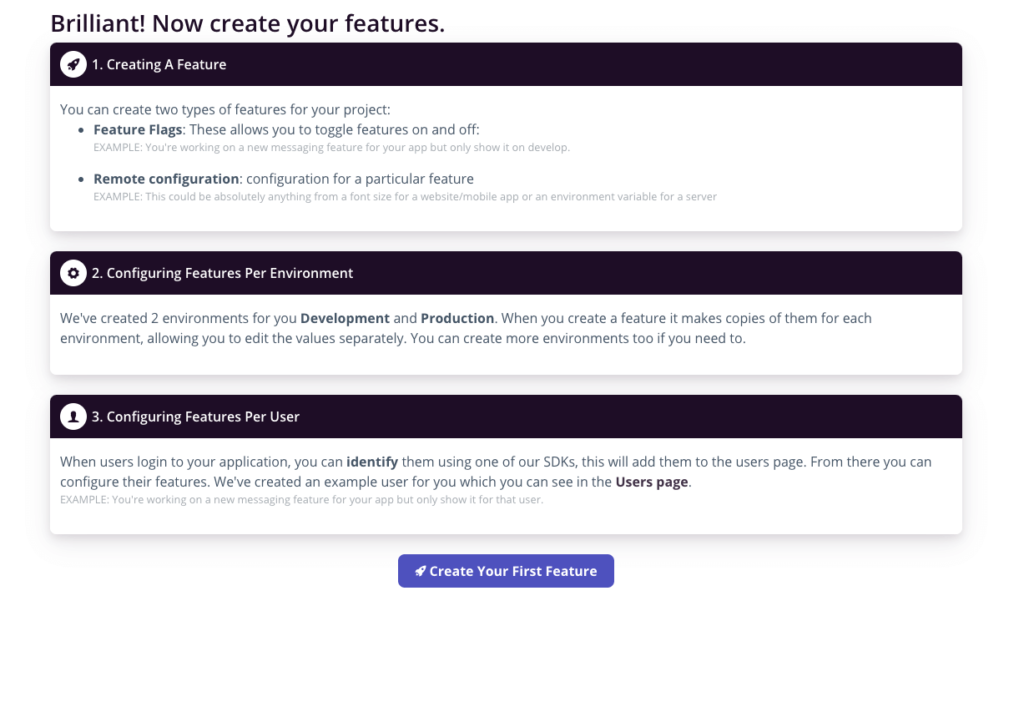
We will come back to this screen when we want to add a feature flag to our application.
Now, let’s start by creating a Golang server application.
Let’s code the Golang feature flag!
To keep this tutorial simple, we will create a rudimentary Go server application. It will be exposed on localhost and will be using our local system storage. This server maintains a list of books and exposes two APIs:
- to add a new book and
- to query the books present in its records.
If you do not have "go" installed on your system, download and install the latest stable version from this link.
TL;DR: All the code is present in https://github.com/abhishekag03/flagsmith-go-feature-flag-demo with step-by-step commits. Feel free to refer to it at any time if you feel confused.
STEP 1: Go setup
Make sure you have "go" installed by running this command on your terminal:
I’m on version 1.19.1, thus getting the below output.

STEP 2: Code folder setup
Create a new folder in your workspace by running the below command(Feel free to change the folder name):
Change your current directory to the “flagsmith-app” folder by running:
Make a new empty go file in this folder. This file will contain all our logic and API definitions.
Create a go.mod file. Go mod files are mandatory for each go module to run. These describe the module’s properties like dependencies. Further, read here.
Your directory must now contain 2 files like shown in the image below(run “ls” command to check):

STEP 3: Familiarise yourself with the magical Gin
We will use the Gin framework to create a server for easy bootstrapping. If you’re not familiar with Gin, I would highly recommend reading its documentation.
Installing Gin is pretty simple, just run this command:
STEP 4: Create a GET API Endpoint
Paste the below code to your app.go file. A detailed line-by-line explanation has been added as comments in the code.
Run the go mod tidy command so that it can pick up the dependencies from your code and import them.
Now you should magically see a “go.sum” file with 80+ lines of code appearing in your directory. What is this file?
This file contains the checksums for each direct/indirect dependency. This helps Go validate if any of the dependencies have changed when we are running the code again.
Let’s run the server now. Simply run:
You should see an output below:
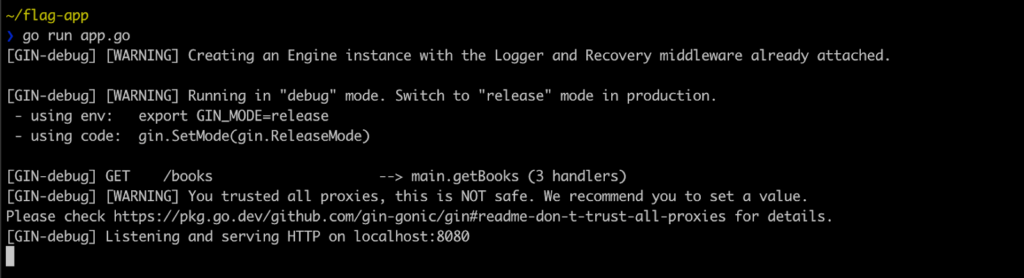
The warnings can be ignored. The main line of relevance here is “[GIN-debug] Listening and serving HTTP on localhost:8080”
STEP 5: Testing the GET Endpoint
Open a new terminal window and call the /books endpoint using curl. You should see a response like below:
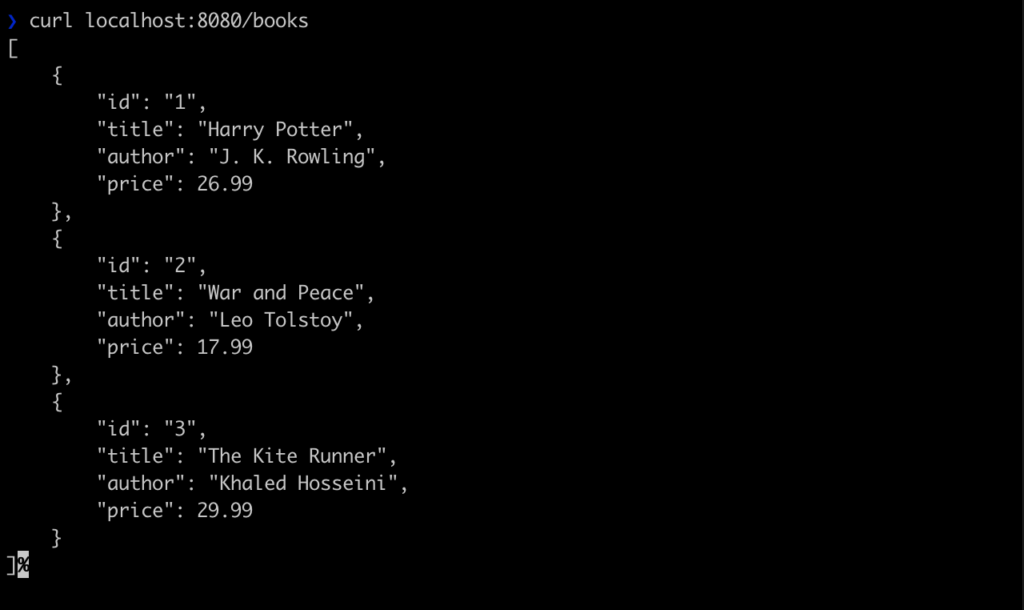
This is the same list of books that we hard coded in our books list in the code.
OR You can simply go to your browser window and type localhost:8080/books. The same response should be visible.
STEP 6: Add a POST endpoint
Simply add the below lines to the main function. This is a very basic implementation that adds a new book to the existing list of books.
Your main function should now look as follows:
STEP 7: Testing the POST endpoint
We will now try to add a new book to our list. Feel free to add a book of your choice, I’m adding a book named “Famous Five” by Enid Blyton that costs $20.
Bring up the terminal window and restart your main server.(In case it was already running using Ctrl + C to stop it).
To run the server again
In a new terminal window, paste the below command to add a new book:
You should see an output similar to the one shown below:
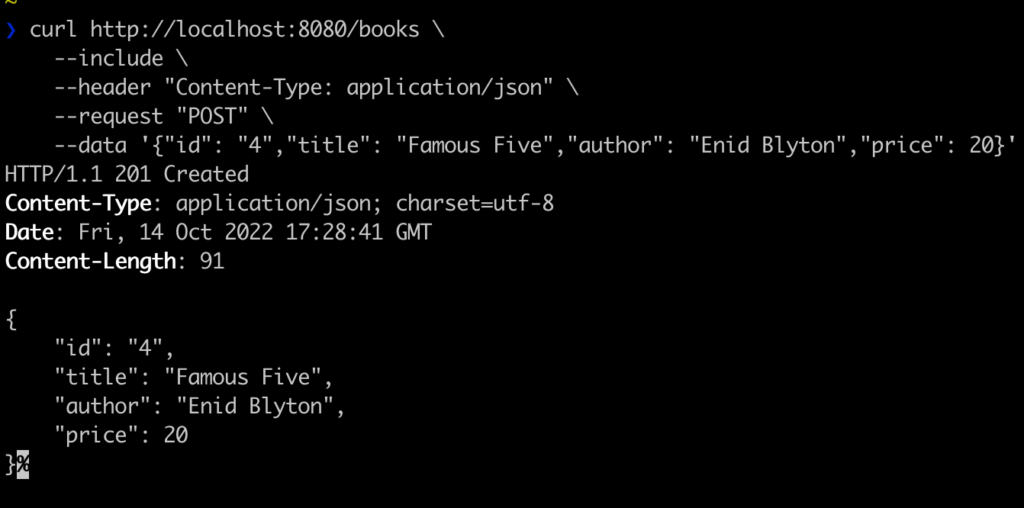
This is a successful response that prints the book that just got added to the list.
In the other terminal(where the server is running), you should see

A 201 response indicates that the post request successfully created the requested object. More details here.
Congratulations, our application is ready to serve all the traffic now.
STEP 8: Understand the need of Flagsmith in our application
Now that our service is ready, imagine you want to restrict the time at which this API can be invoked. We probably do not want our library to be active all day long, just during the day hours and on working days.
How can we add such functionality with the click of a button? This button would not only help us in the above scenario but also when we have an unexpected DB failure or any other downstream service issue or an attack. This button would help us to stop adding new books with just a click. This is the kind of power Flagsmith offers without having the need to host our own feature flag server.
Time to return to our Flagsmith UI. Click on the “Create your first feature” button on the screen we left off above.
Add a new feature flag by the name “enable_new_books”. This will control whether or not we allow adding new books. Turn enabled by default to “true”. The below screenshot shows the configuration.
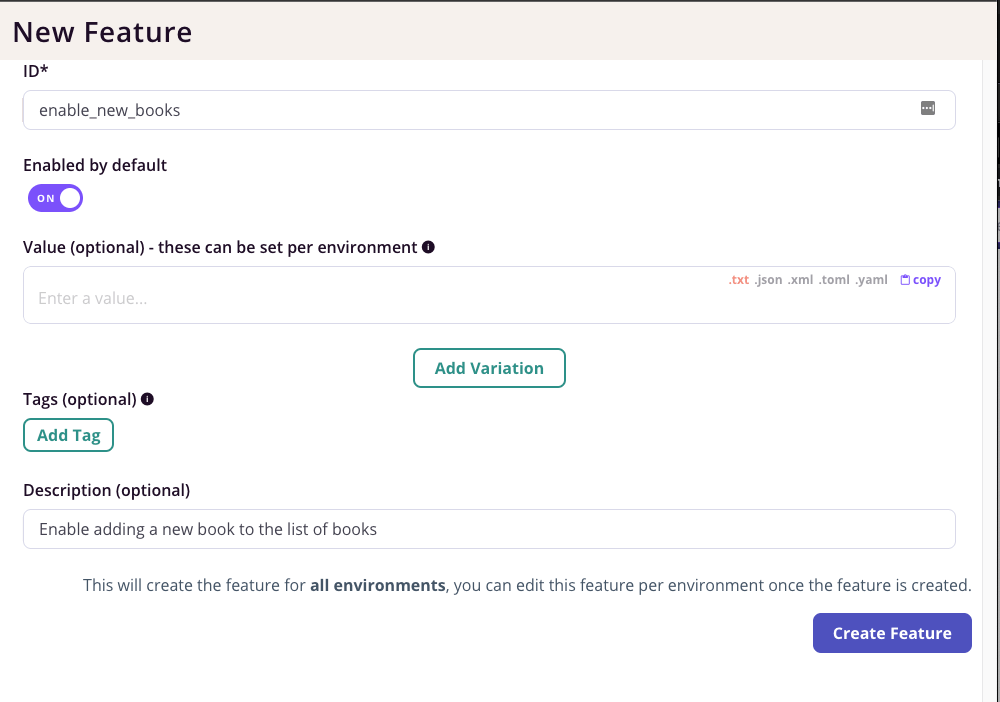
Value can be left blank, we will come back to it later. Click on “Create Feature” (make sure you have enabled it). The UI should show the following:

We will also need a Flagsmith Server-side environment key to initialize the feature flag client. Let’s generate that.
Navigate to “Settings” from the left bar on the Flagsmith page. Click on “Create Server-Side Environment Key”. Give it a name for e.g: “test-app-key”

Keep the key handy in your notes. It should be of the form “ser.******....”
STEP 9: Add Flagsmith integration to the code
Let’s add the Flagsmith client code to our code. The Go server-side documentation on the Flagsmith website here lists all the steps required to do so. We will cover them here as well.
First, you need to install the Flagsmith Go client by running(in your terminal):
Now, we need to import this in our Go file and initialize it. Add the below import statement.
Initialize the client in your main function by adding the following lines of code:
We will come to <FLAGSMITH_ENVIRONMENT_KEY> in a moment, but for now, your main function must look like this:
The best way to manage the environment and secret keys is to create a separate file and add them. We will create a config.yml file in the same directory and read it in our go code.
STEP 9.1: Create config.yml file
In the same project directory, create a new file and add a config key value pair inside it like shown below(I have hidden my secret key):

STEP 9.2: Read config in code
We would need a Golang YAML library to parse a YAML file. It can be added by running:
Add the below import:
To read the config file, add this method to your go file:
We then need to call this method just before initialising the Flagsmith client.
The environment key can now be obtained from this config by simply doing config[“key”]
We can update the placeholder while initializing the Flagsmith client. Thus, our main function should look like:
STEP 10: Use Flagsmith power to toggle API behavior
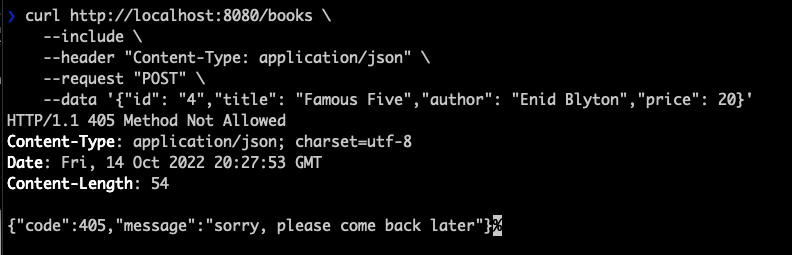
With one line of code, we can check if the feature is enabled or disabled. We will have a simple logic saying, if it is enabled add the book to the list, else give a response saying “sorry, please come back later”.
Feature flag enabled/disabled can be checked with:
Our modified POST method implementation looks like the following:
STEP 11: Let’s test whether the Golang feature flag works
Make sure to save your code.
Since we added new imports, we must run:
Restart the server by running:
Try adding a book to the list by running the same curl command:
This should be successful.
Now, navigate to the Flagsmith UI and toggle the “enable_new_books” feature OFF as shown below:

Running the same command as above this time should give you an error message:
Did you see how powerful this was? This is a very basic application; imagine the amount of control feature flags can add to a large-scale Go application with just the click of a button.
STEP 12: Using Flagsmith Local Evaluation mode
First, let’s talk about what is the “Local Evaluation” mode in feature flags.
The way in which we added the feature flag above, it always makes a “BLOCKING” network request to the Flagsmith server for getting the feature flag value. Now, imagine having too much traffic on your application. A blocking network call every time leads to increased latency for all the requests. Also, our application may not be so critical that we want to get the updated feature flag value within a fraction of a second. Most applications can still function if the updated value is not reflected up to a certain time.
Let us consider that our application is ok up to 30 seconds after the feature flag value update has taken place. In that case, there is no need to make a call on every POST request. What if we just make an async call every 30 seconds and use the value directly from there? It will save us huge numbers on latency.
Flagsmith allows us to add a configurable “Environment refresh interval” when running in the Local evaluation mode that solves exactly the use case described above.
All we need to add is the following while initializing the Flagsmith client:
STEP 13: Testing Flagsmith local evaluation mode
The latency difference would not be visible in just a few manual requests. Thus, I have written a small Python script that would make it very evident how powerful this feature is.
Remember to have the feature flag enabled, update the client as defined above and restart the server.
Save this Python script in the same directory:
Run this script in both modes - (a) with Local Evaluation turned off, and (b) with Local evaluation turned on.
Notice the difference in time taken.
1. Without Local Evaluation

2. With Local Evaluation
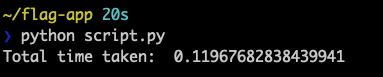
The job got done in FRACTIONS of seconds. Take a note of the amount of time saved in just 50 requests. Imagine a massive application serving thousands of requests per second. This is one of the most powerful features that Flagsmith offers.
20 seconds vs 0.1 second. HUGE!
STEP 14: Leveraging feature values
While creating a new feature, we saw an option to add a feature value. Let’s understand how that can be useful.
For instance, due to some requirements, we only want to accept books that have a price greater than some value. This is to avoid filling up our library with cheap and less-selling books. Also, helps us maintain a standard.
However, we want to keep varying this threshold price based on the rush and staff capacity. It is definitely not feasible to amend the code every time as per the requirement.
What if this can also be achieved with the click of a button? Yes, with Flagsmith it can be.
Go ahead and update the feature flag value to 30 as shown in the below image. Also, do enable the feature back so that we can continue testing.
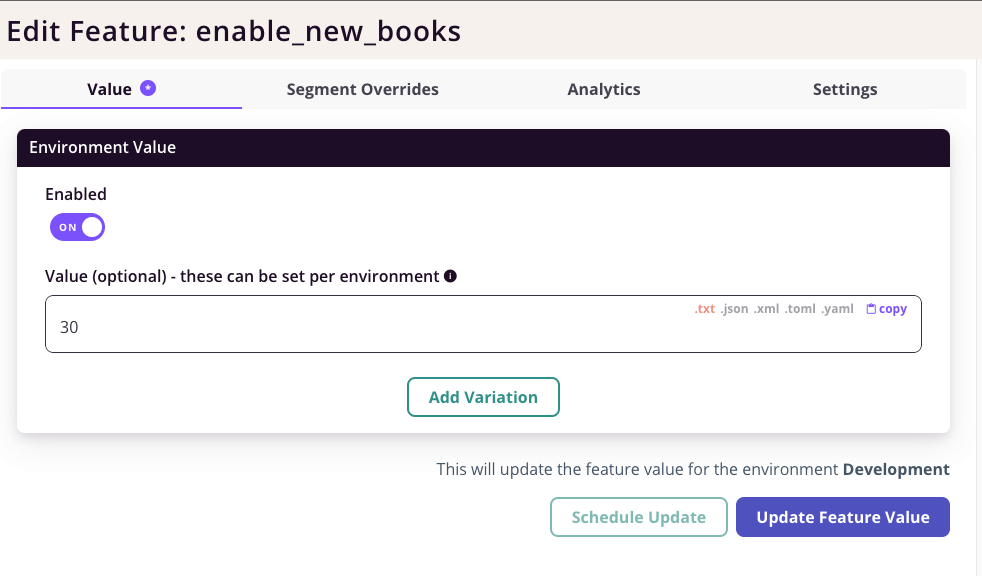
Click on “Update Feature Value” to confirm.
To read this feature value, all we need to do is:
Now, let’s add a check to ensure all the new books added are of a price greater than $30.
The updated POST method should now look like the one below. Notice the changes inside the “isEnabled” if condition.
STEP 15: Check the working of the Golang feature flag value
Run the app in one terminal.
In another terminal run the command with the price of the book as $20:
This should throw an error as below:
If you increase the book price to say $40, it will work.
This should give a 201 response code.
Now it is so convenient to update the minimum allowed price directly from the Flagsmith UI. Feel free to play around with these values and toggling the switch on or off.
If you want to start using Flagsmith as your Golang feature flag software- just create your account here or contact us for the on-prem solution.
P.S. If you like this "Golang feature flag" guide, you can check out our other guides:


OpenTelemetry, without the vendor lock-in: Introducing full observability for Open Source and Self-Hosted Flagsmith customers


.png)
.png)
.png)

.png)


.png)


.png)

.webp)